Guide 157 min read
LlamaPresenter - Timers
LlamaPresenter has two kinds of timer groups: Agenda timers and General timers. Agenda timers run one at a time and support the service sequence on the stage screen. General timers each run independently, so several countdowns can be active together.
Open the Stage tab to manage both lists. Use the Agenda for worship, announcements, and the sermon; use General timers for doors opening, livestream starts, check-in deadlines, or coffee breaks. Either group can supply a live timer value to a message or prop.
What this guide helps you do
Use Agenda timers for the service sequence and General timers for independent tasks. Show their values on stage or insert them into messages and props.
01
Agenda timers: one service item at a time
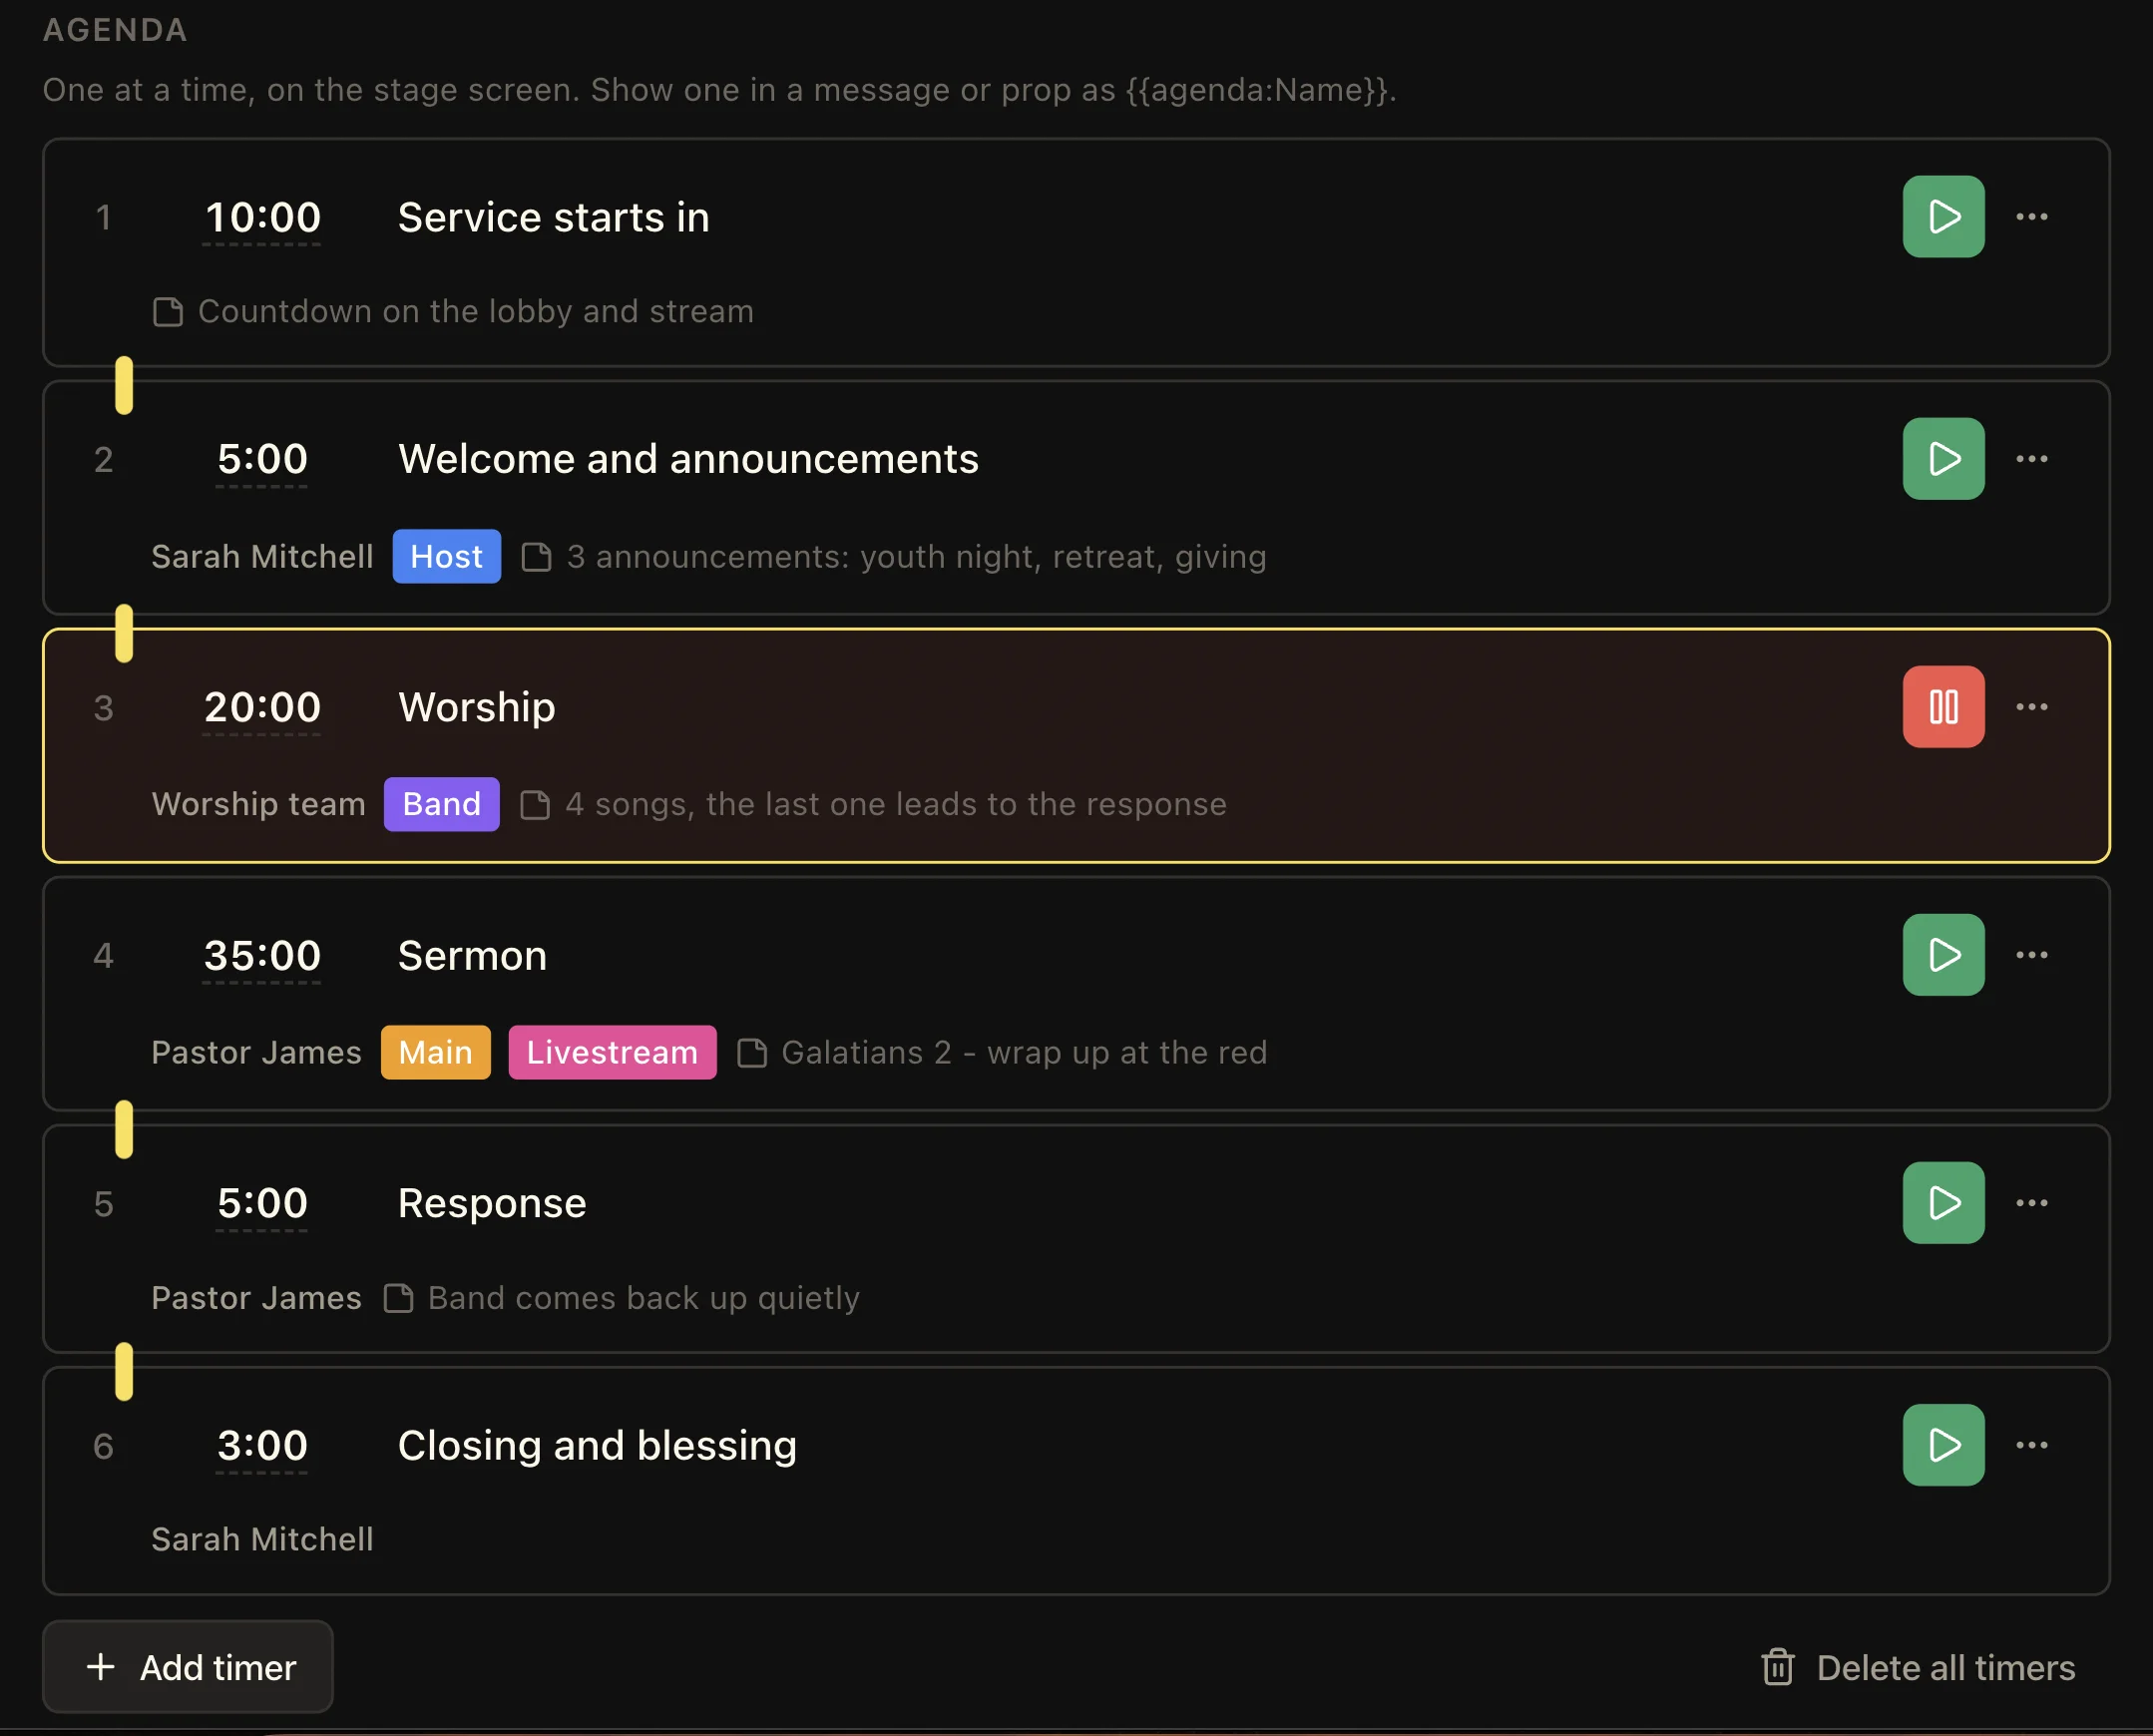
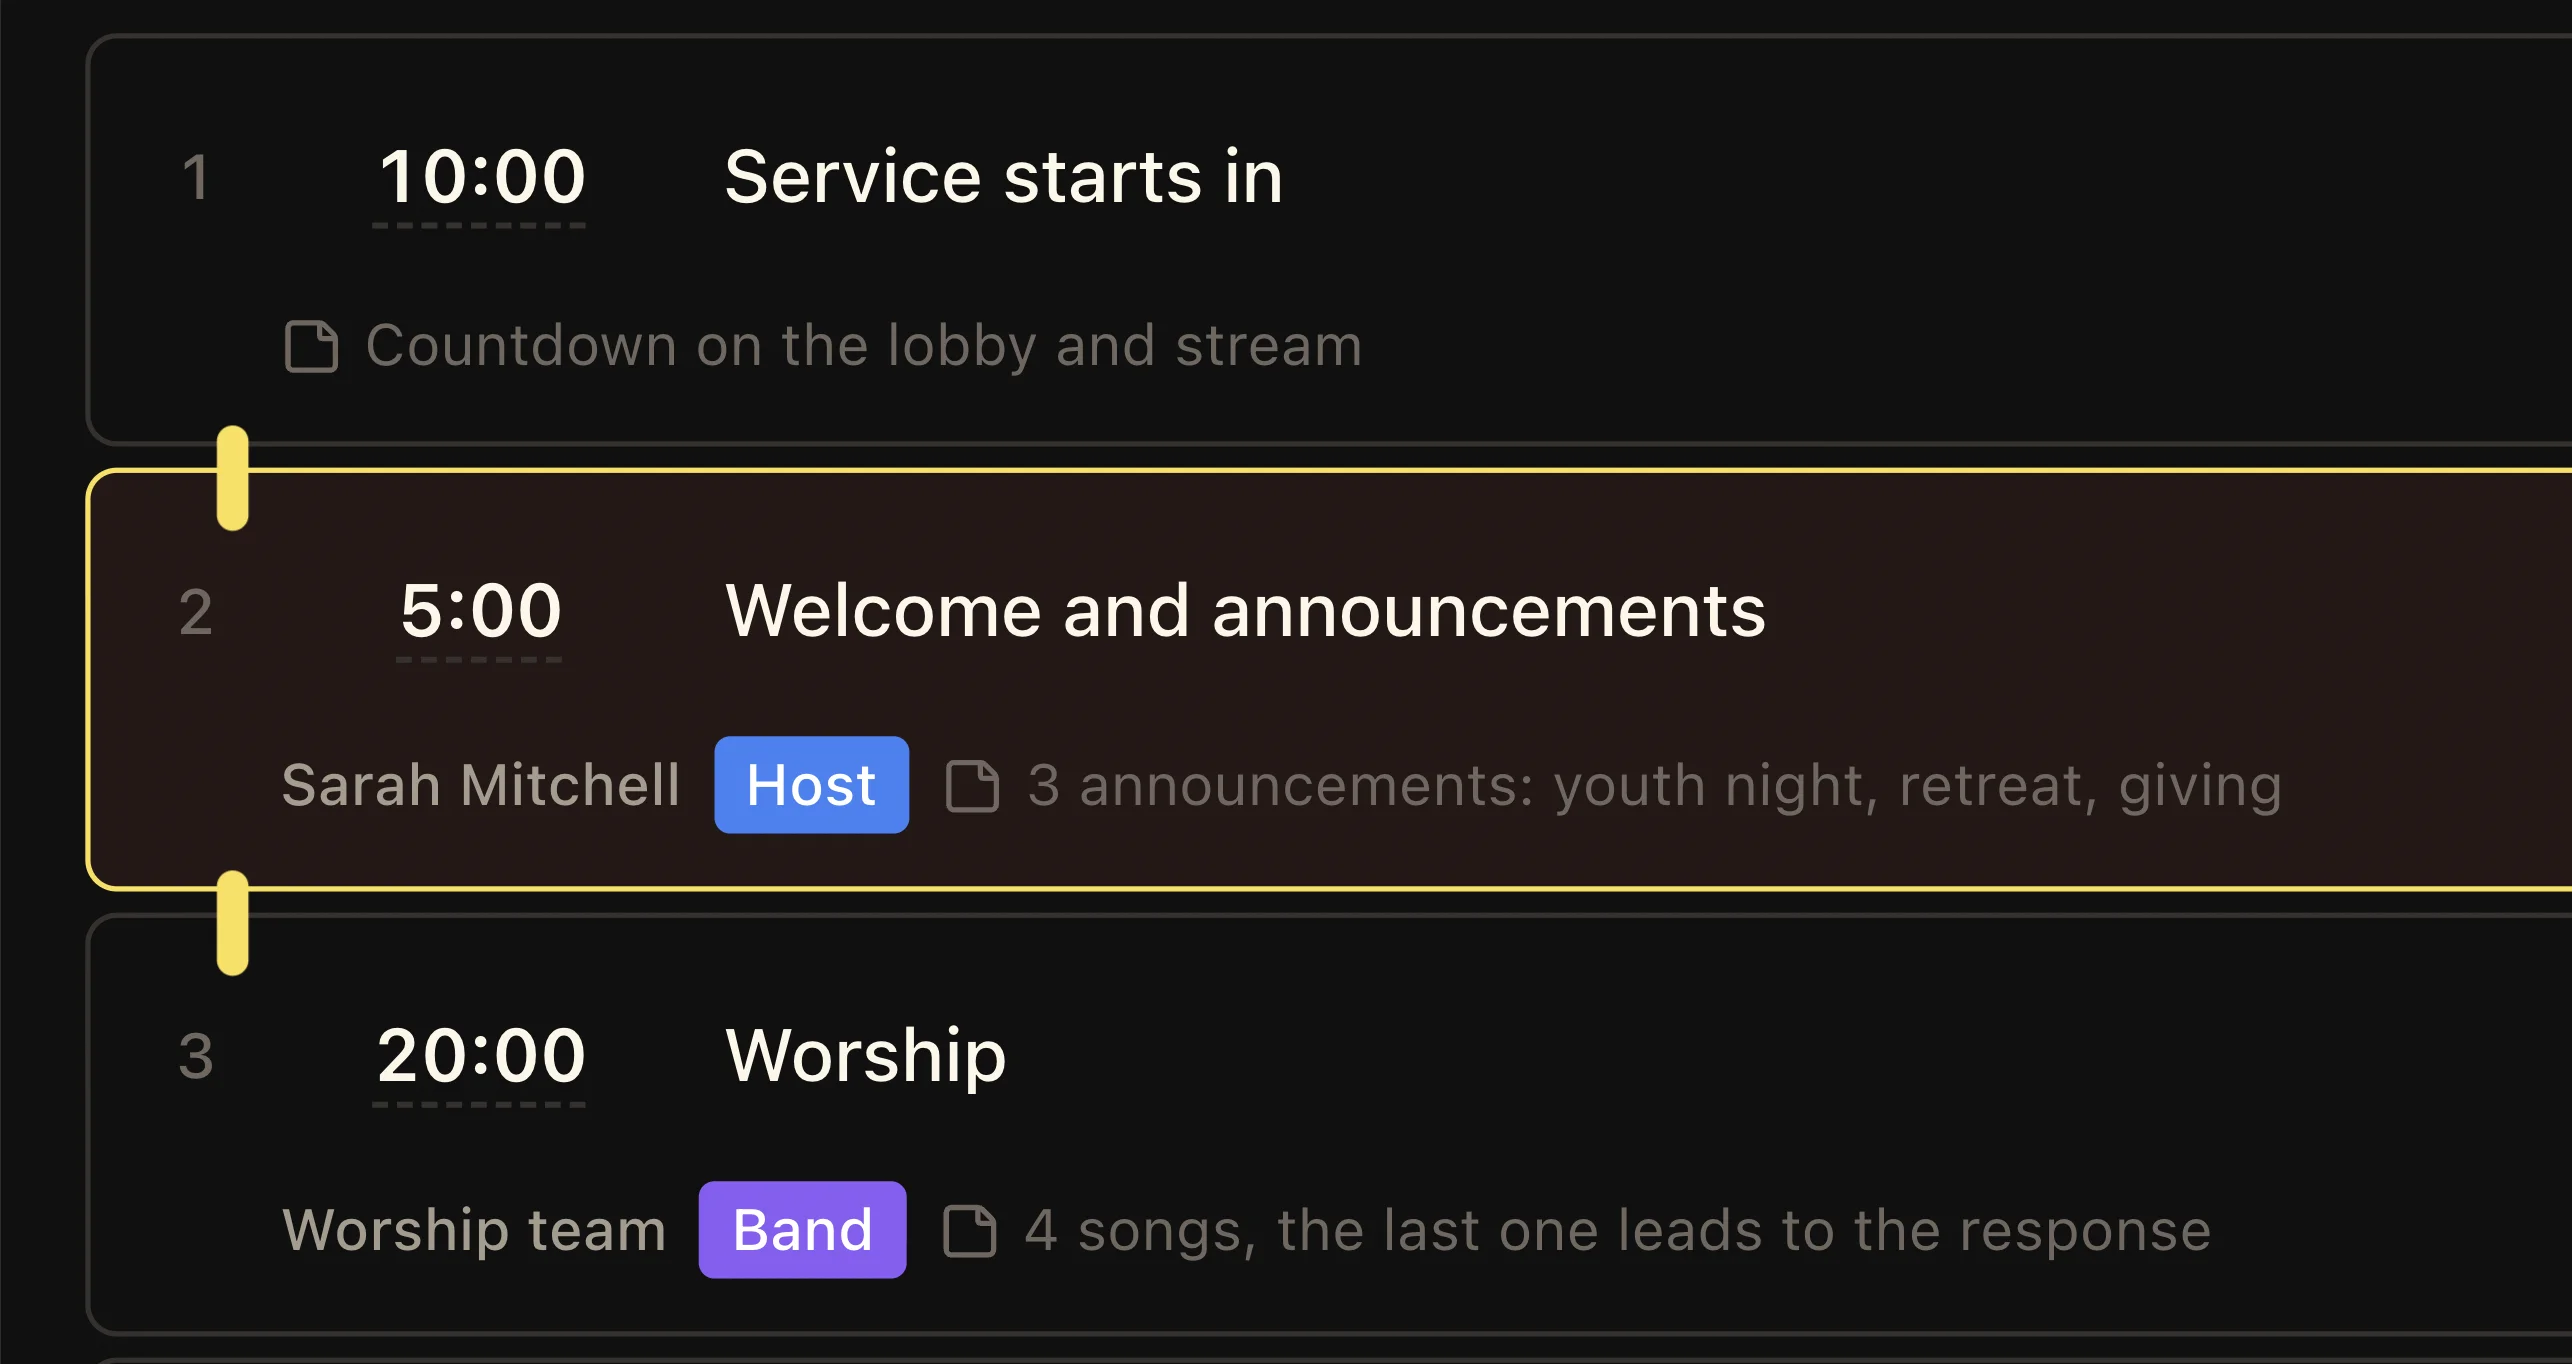
Build the order of service in the Agenda list. Press Add timer for each item, set its name and duration, and arrange the items in service order. The example moves from a ten-minute pre-service countdown through announcements, worship, the sermon, response, and closing.
Only one Agenda timer runs at a time. Use the green Play button on a row to start it and the red Pause button to pause it. The Dashboard provides controls for the current Agenda timer and a preview of the selected stage screen.
02
Control the current Agenda timer from the Dashboard
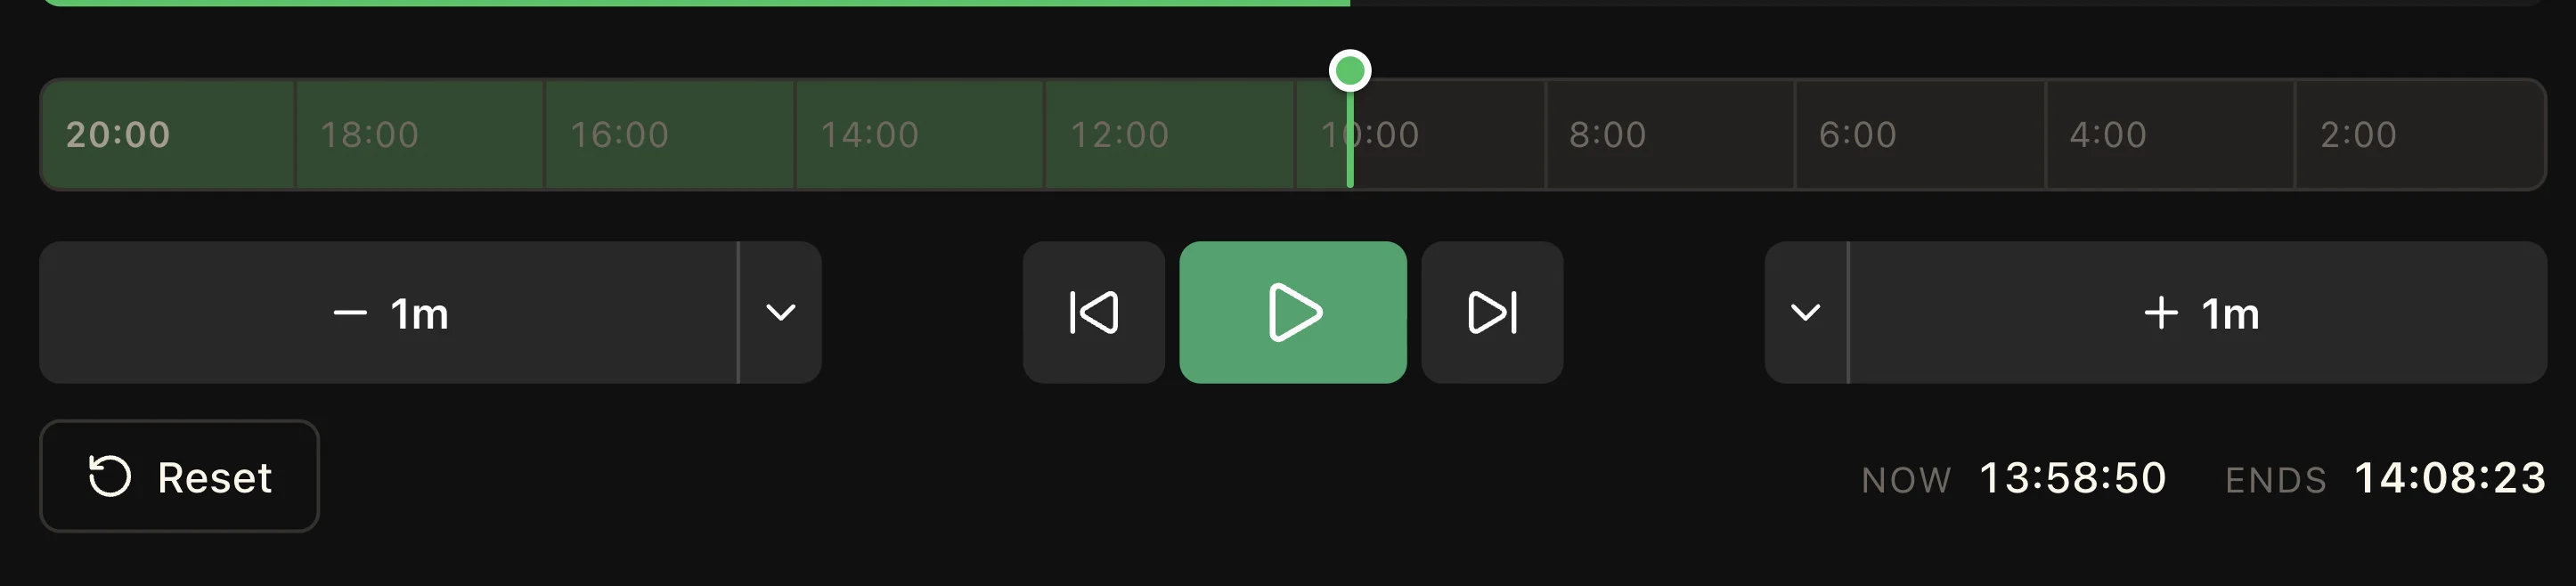
The Dashboard includes previous and next timer buttons, a central Play or Pause control, and Reset. Use the minus and plus controls to adjust the current run; their menus let you choose the adjustment amount.
The time ruler lets you move the current timer to another point in its run. Now and Ends show the current clock time and the expected finish time, helping the operator respond when a segment needs more or less time.
03
General timers: run several timers independently
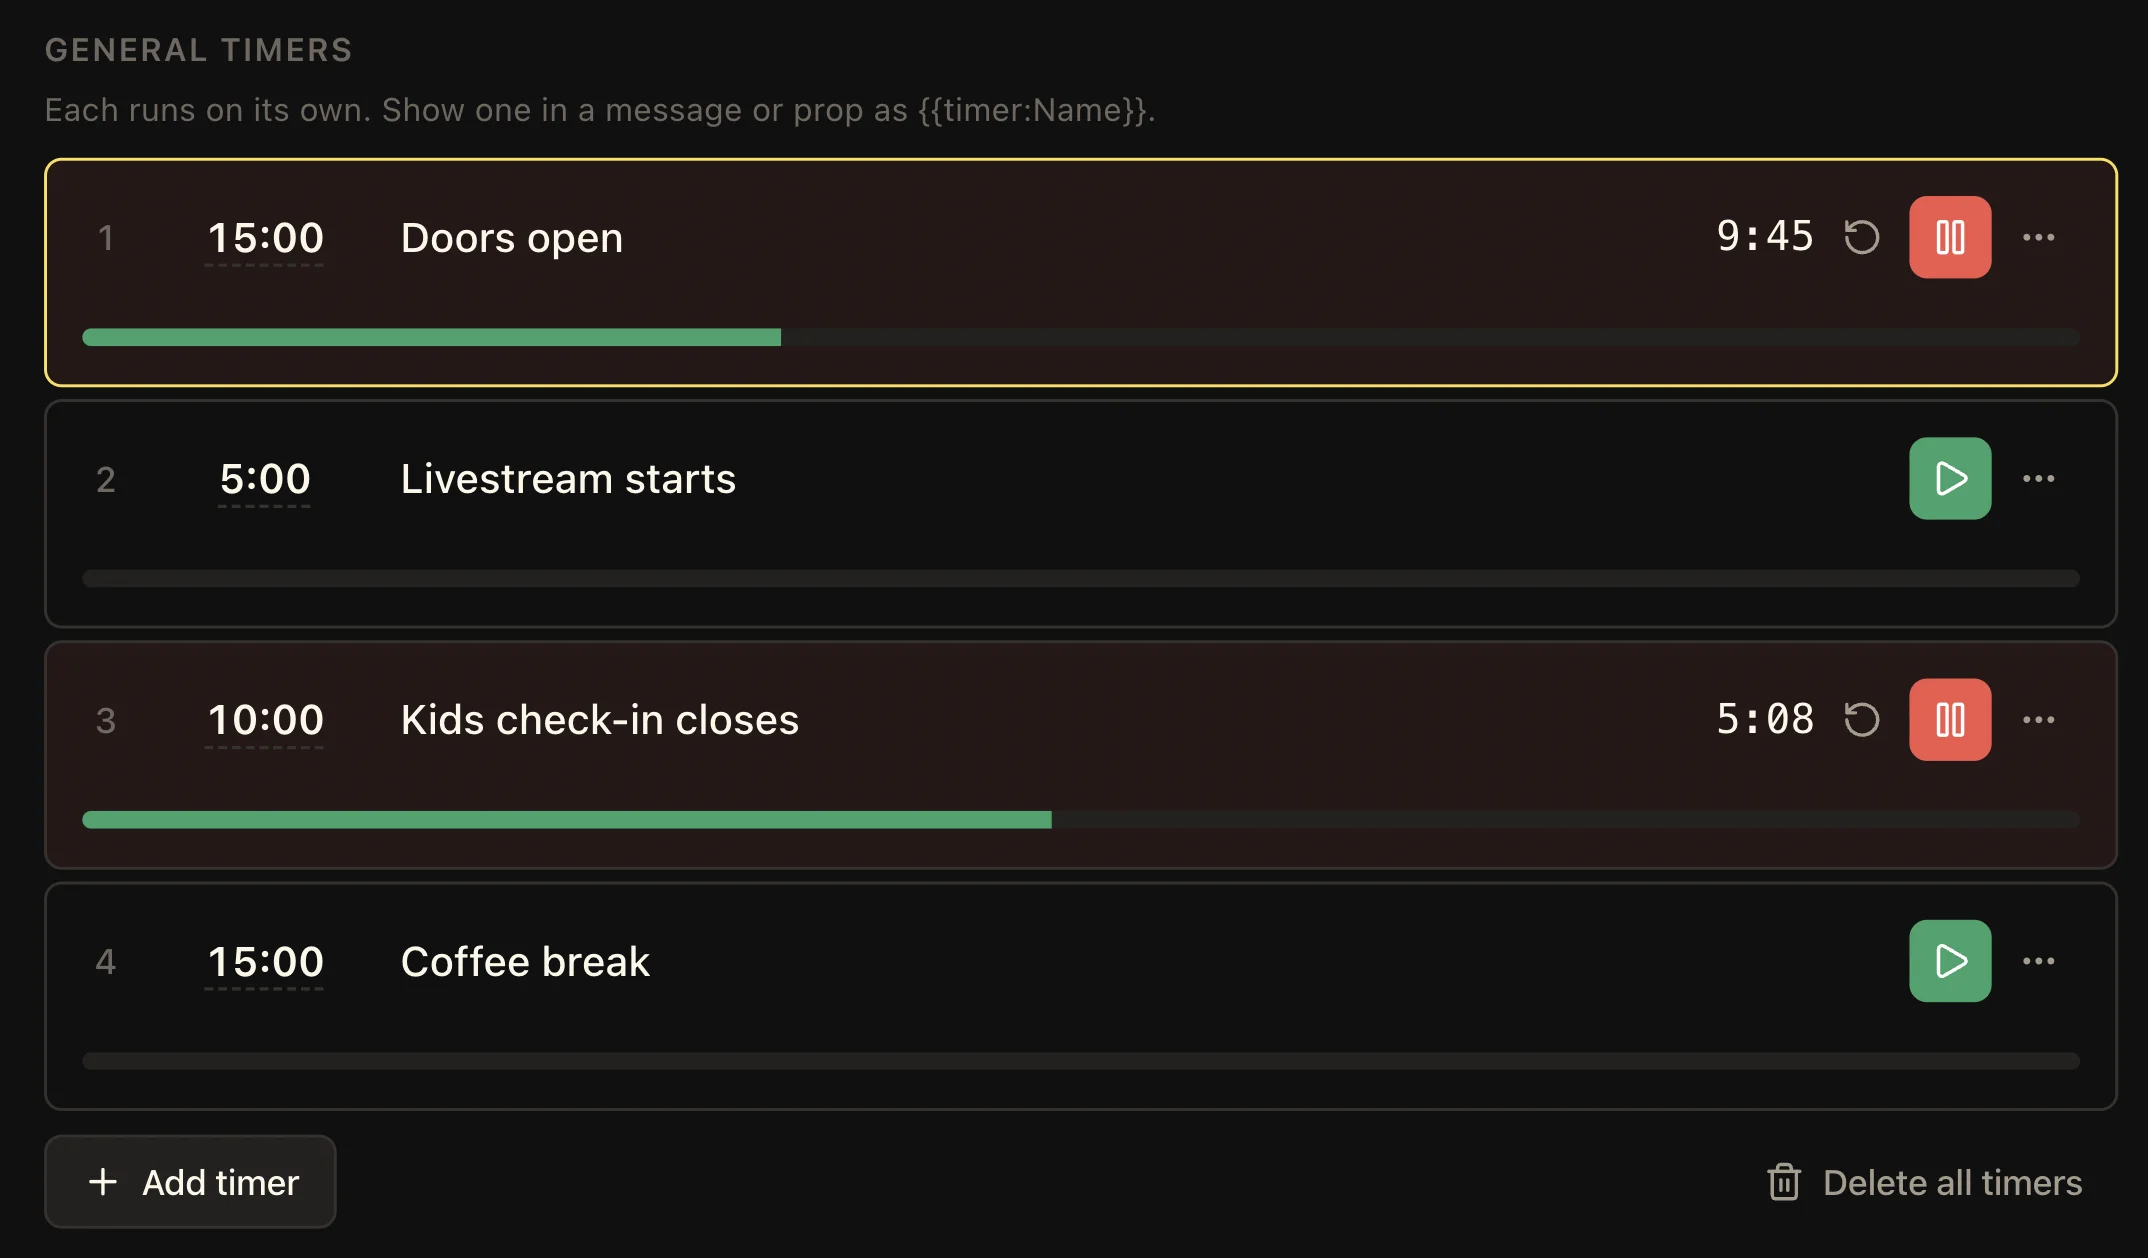
General timers have their own run state. Starting “Doors open” does not stop “Kids check-in closes,” and these timers can run alongside the current Agenda item.
Add and name each timer, set its length, and start or pause it from its row. The live reading and progress bar show how far it has advanced. Use the reset control when you need to return an independent timer to its starting state.
Agenda and General are the two groups. Within a timer, the Counts setting also offers countdown, count-up, and clock modes. Choose the mode appropriate to what you want to measure.
04
Add titles, speakers, notes, and labels
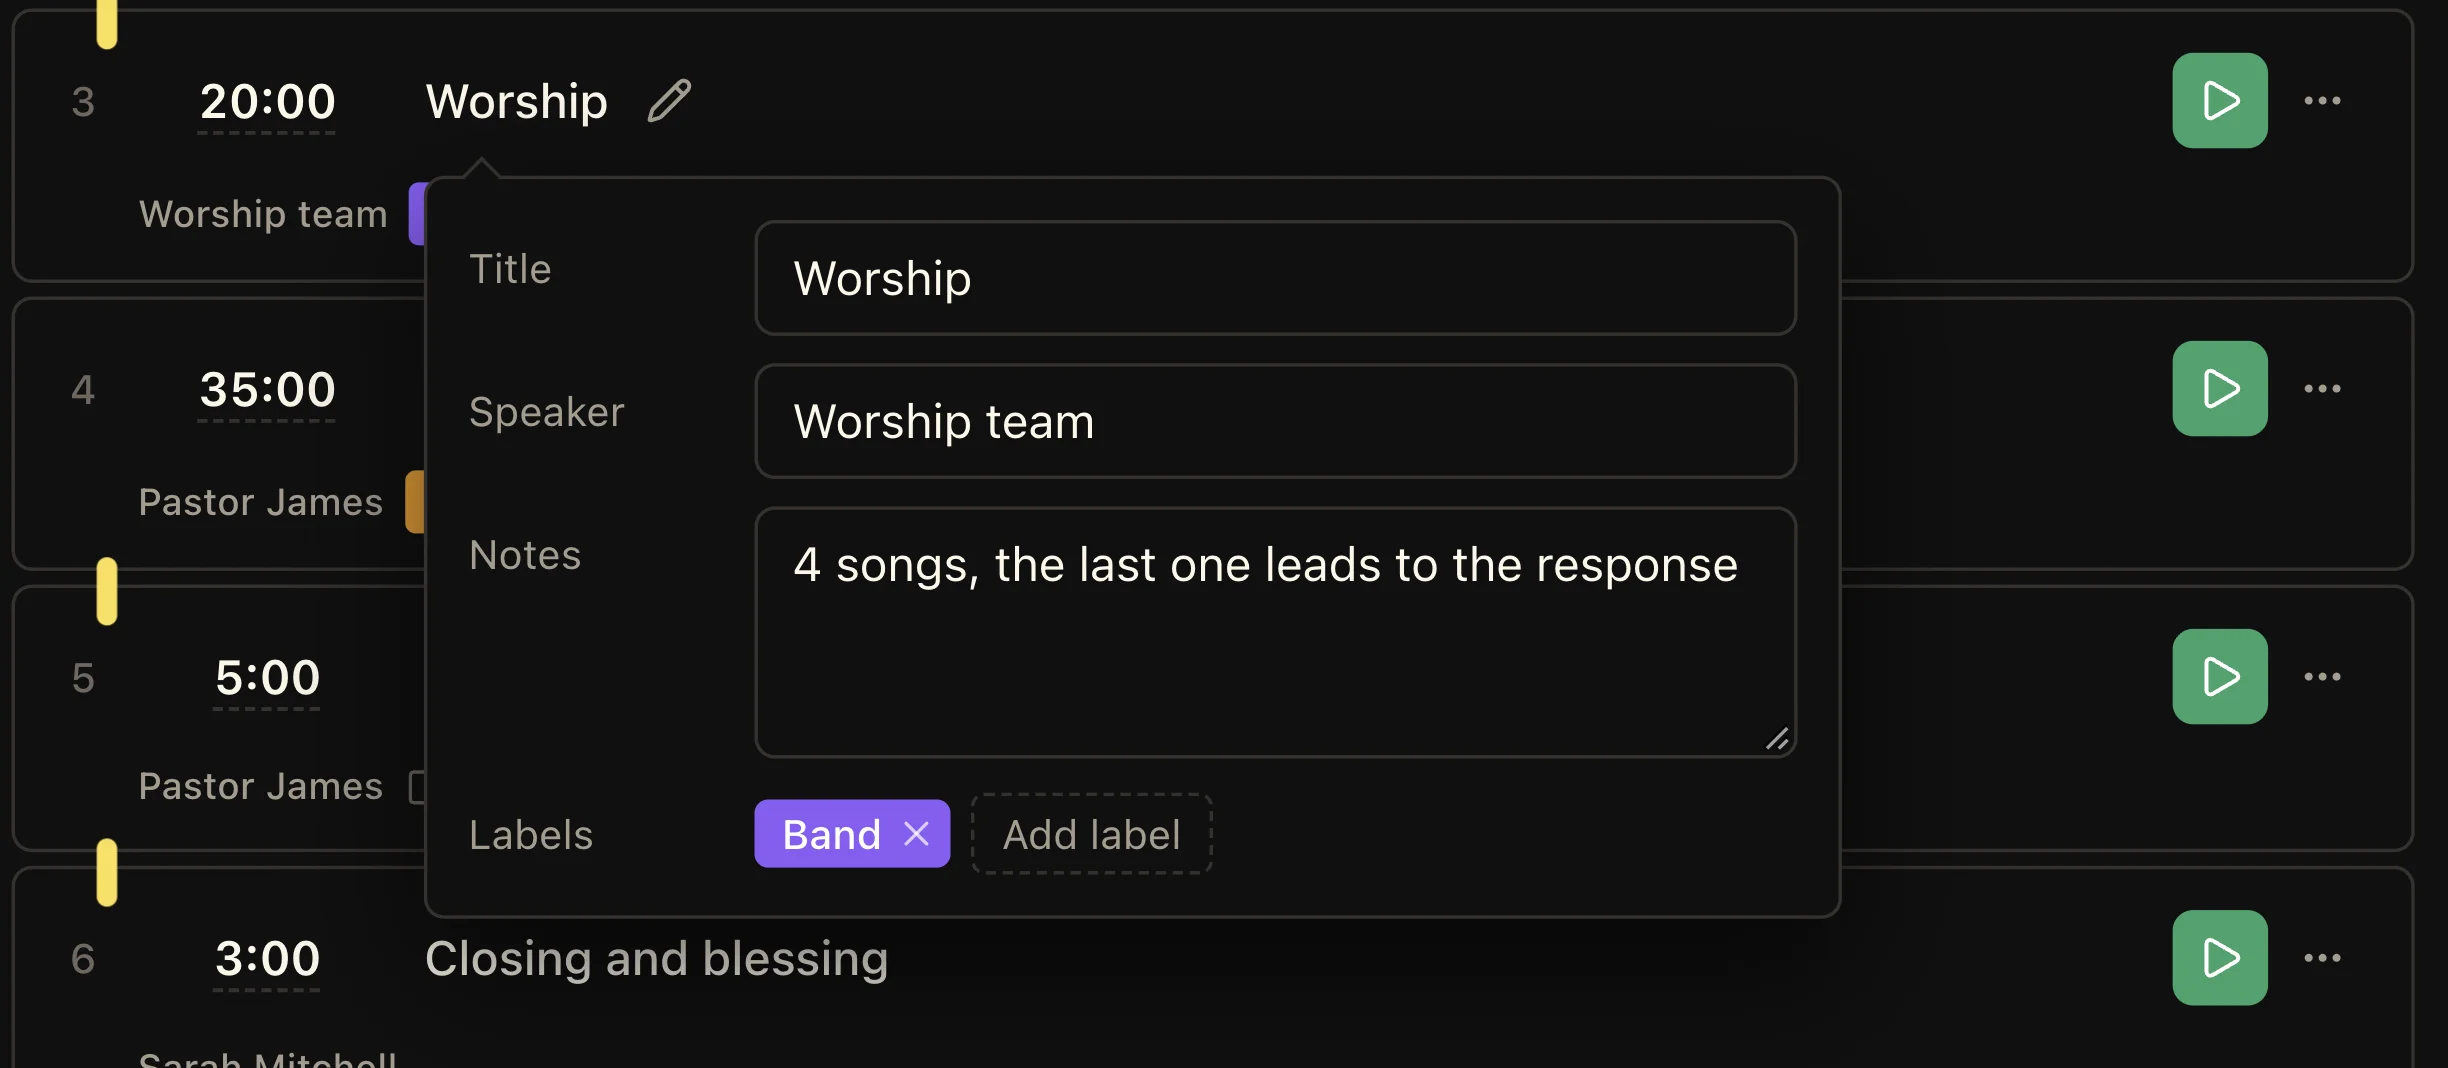
Open an Agenda item’s details from the pencil beside its title. Set Title, Speaker, Notes, and Labels so the operator can see who is responsible and what should happen during that item.
For example, Worship can list “Worship team” as the speaker, carry a Band label, and include a note about the final song leading into the response. Use short titles and practical notes that another operator can understand quickly.
Open the duration controls to choose the counting mode and length. For countdowns, Wrap-up and Final thresholds provide warning colours as the remaining time gets short.
05
Link items for an automatic handoff
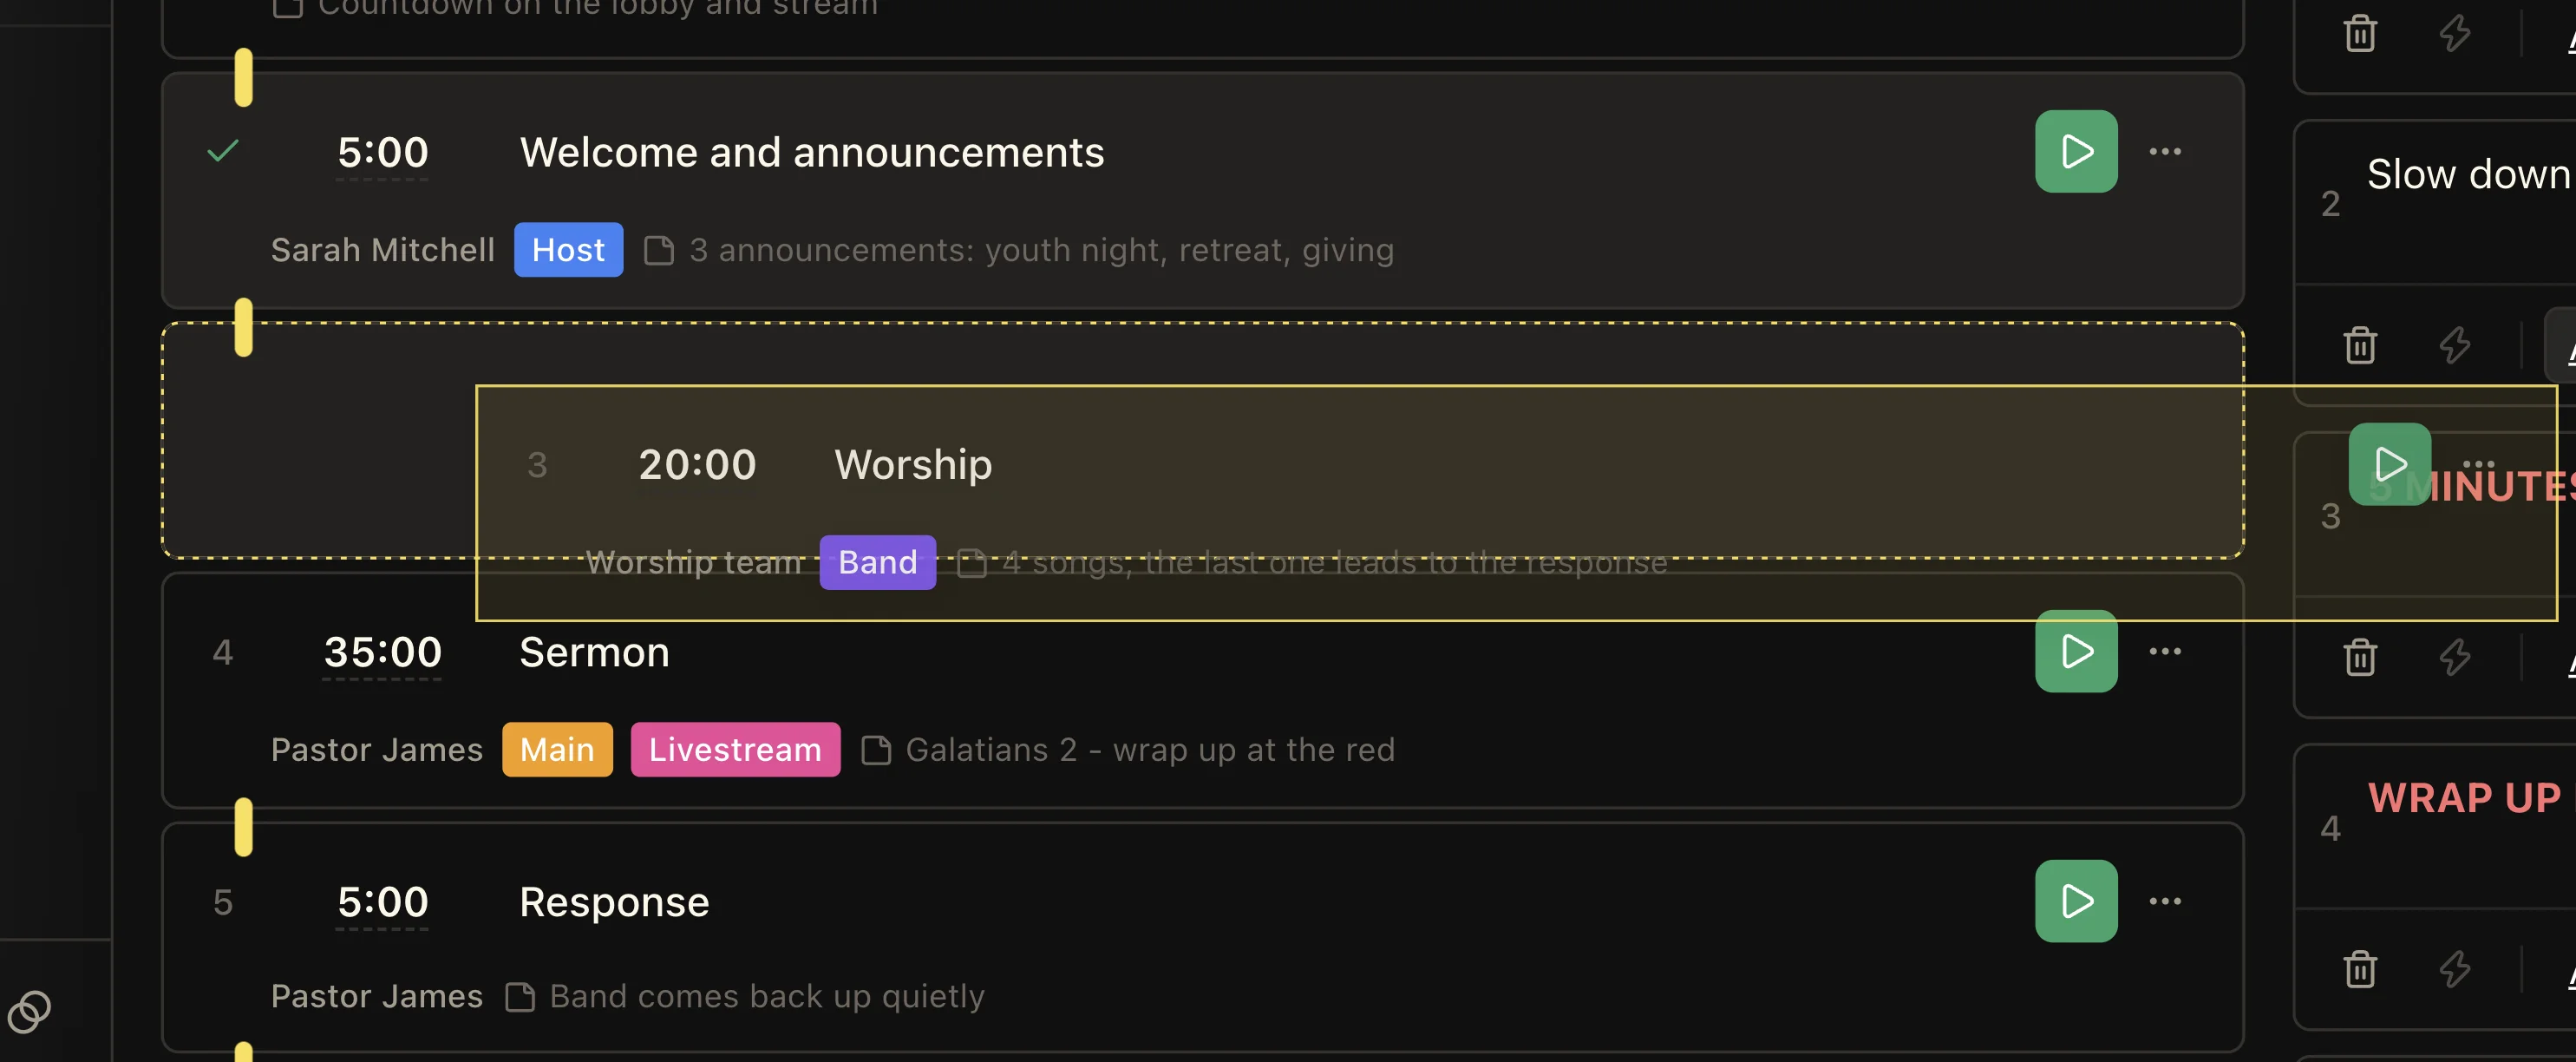
The connector between two rows determines whether the lower timer starts when the timer above runs out. Click the connector to enable the link; the yellow marker shows a linked handoff. Click again to break the link.
Use links when the next segment should follow a countdown automatically. Leave a link off when the operator needs to wait for a cue before starting the next item. General timers also offer links, while retaining their independent run states.
06
Reorder the Agenda as the plan changes
Drag an Agenda row to its new position to keep the list aligned with the actual service order. The highlighted insertion area shows where the item will land.
After rearranging items, review the links between rows so automatic handoffs still match the plan. Use each row’s menu for additional actions, and review the list before rehearsal rather than relying on its previous order.
07
Show the Agenda and active timer on stage
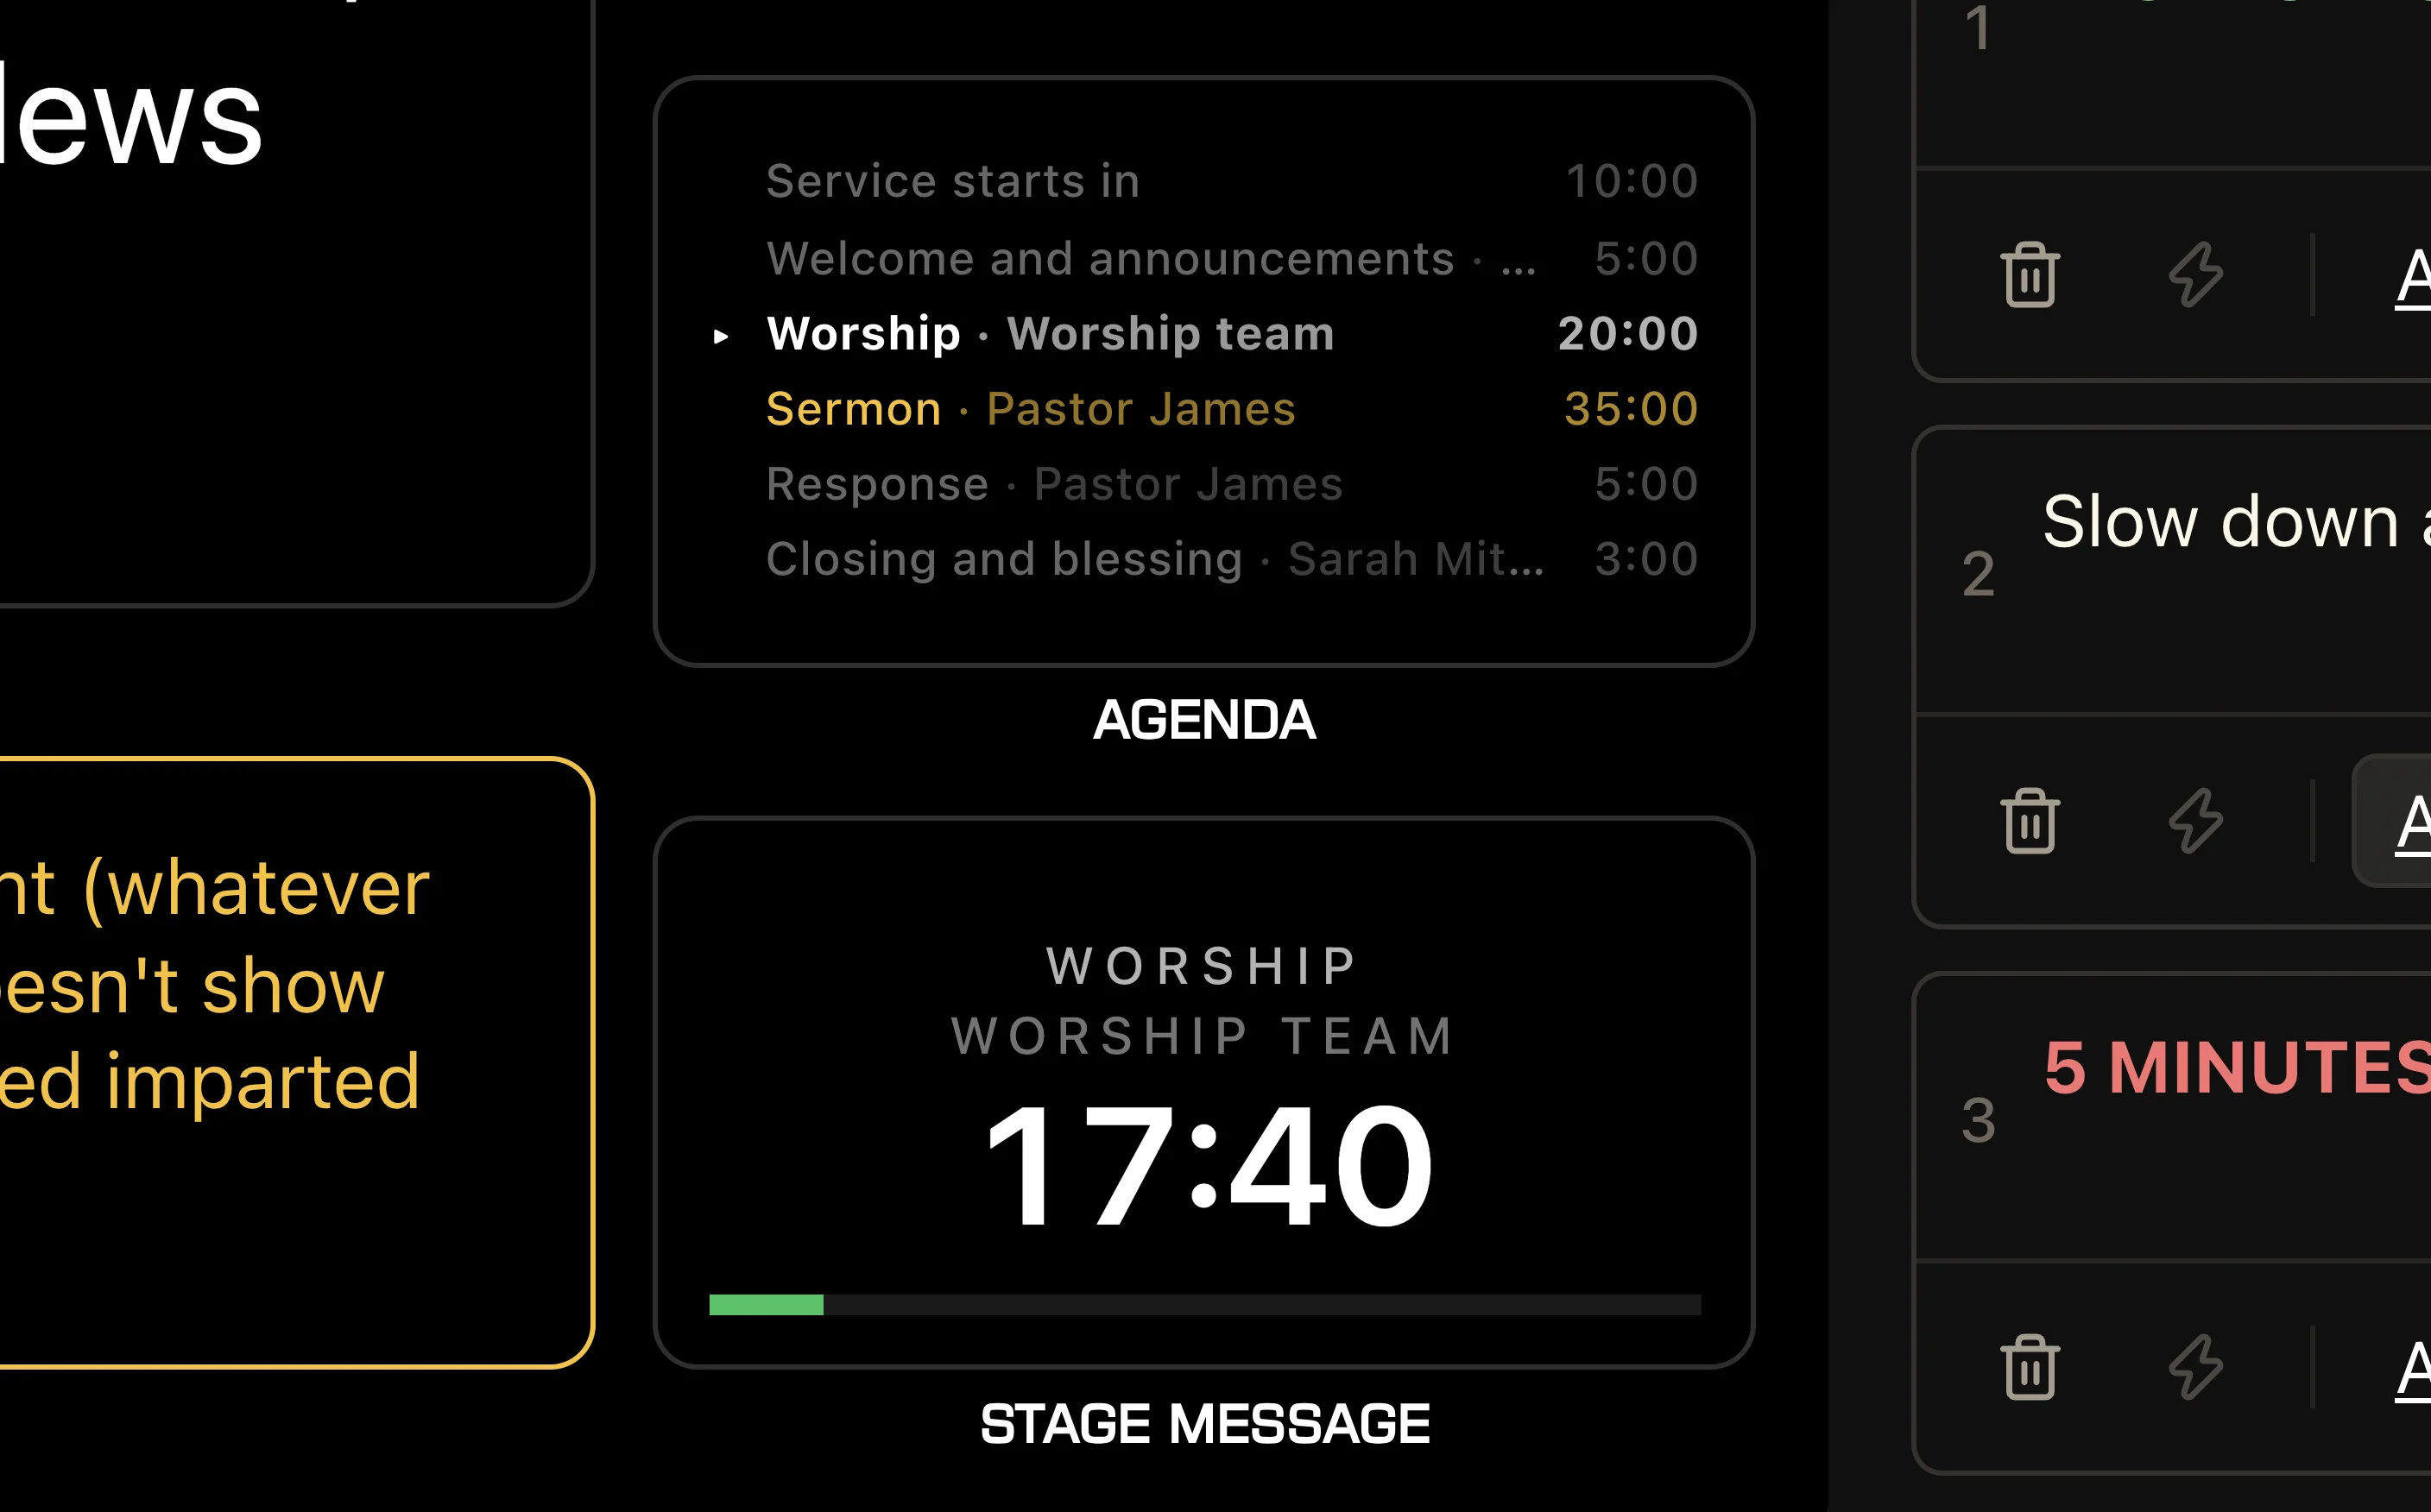
The stage layout can present both the Agenda overview and the active timer. The overview gives the team context about the current item and what follows, while a timer panel provides a larger live countdown.
In this example, Worship is the current item and Sermon is highlighted as the next item. The active timer includes the item title, speaker, remaining time, and a progress bar. Configure the stage layout for the information your team needs to see.
08
Show the timer full screen
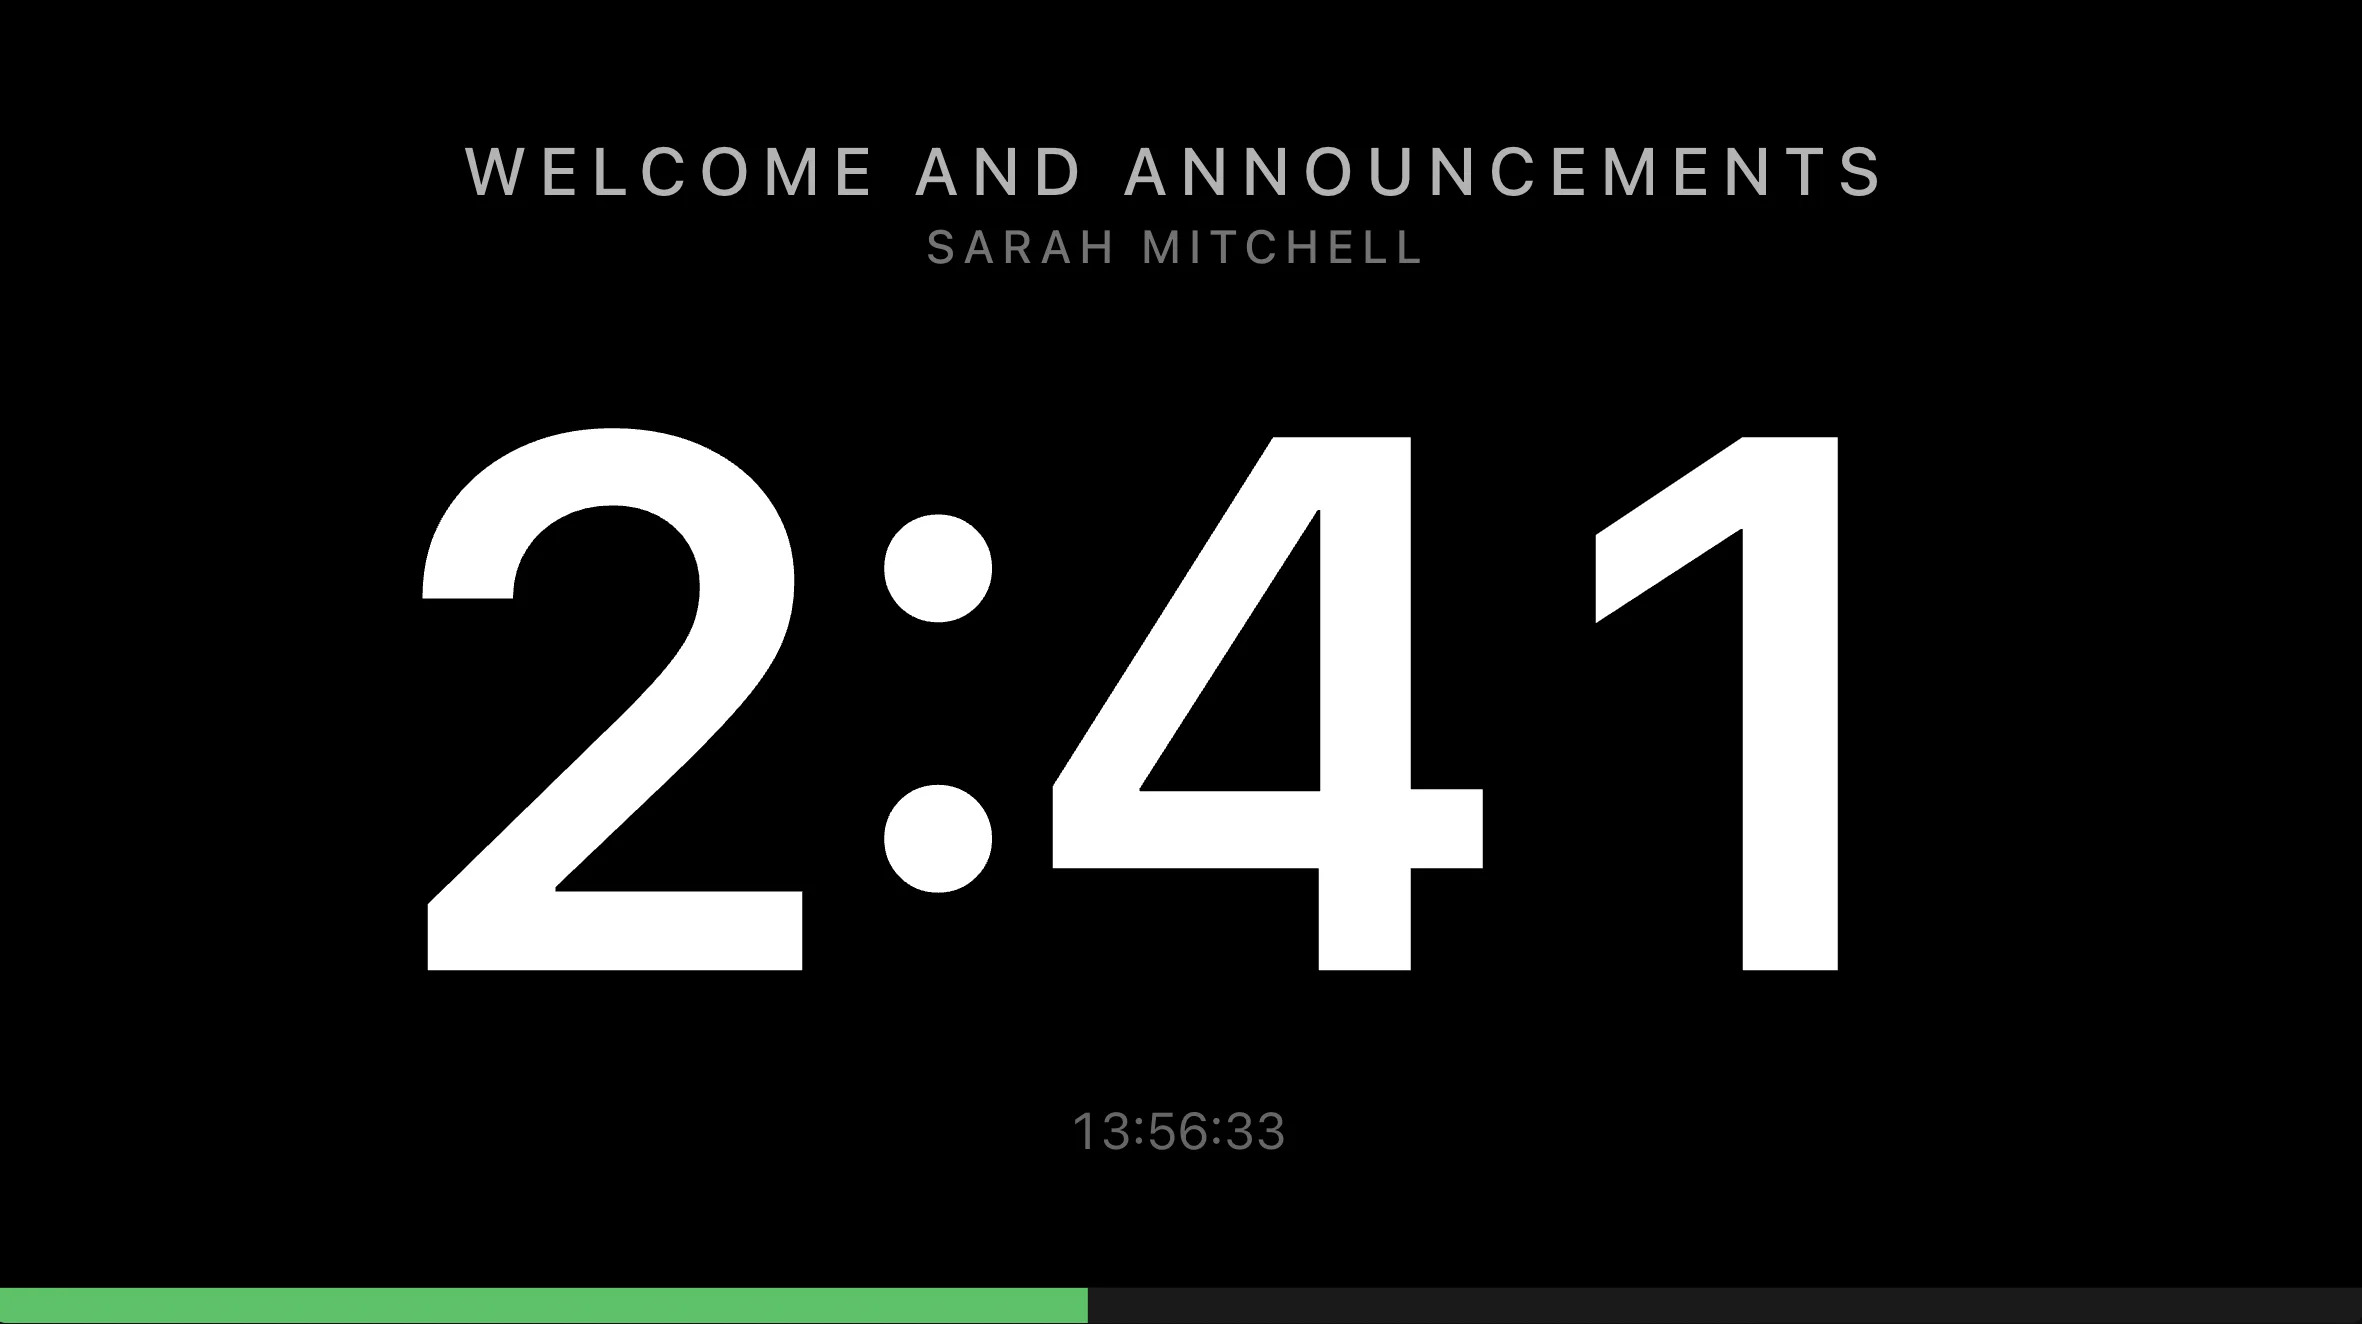
The full-screen timer view fills the display with the current timer. Large digits keep the remaining time prominent, with the item title and speaker above, the current clock time below, and a progress bar along the bottom.
Use this view when a display should focus entirely on the timer. In the example, Welcome and announcements has 2:41 remaining. As the timer runs, the countdown and progress bar update together; the configured Wrap-up and Final warnings help make the last part of the countdown visible.
09
Show timers in messages and props
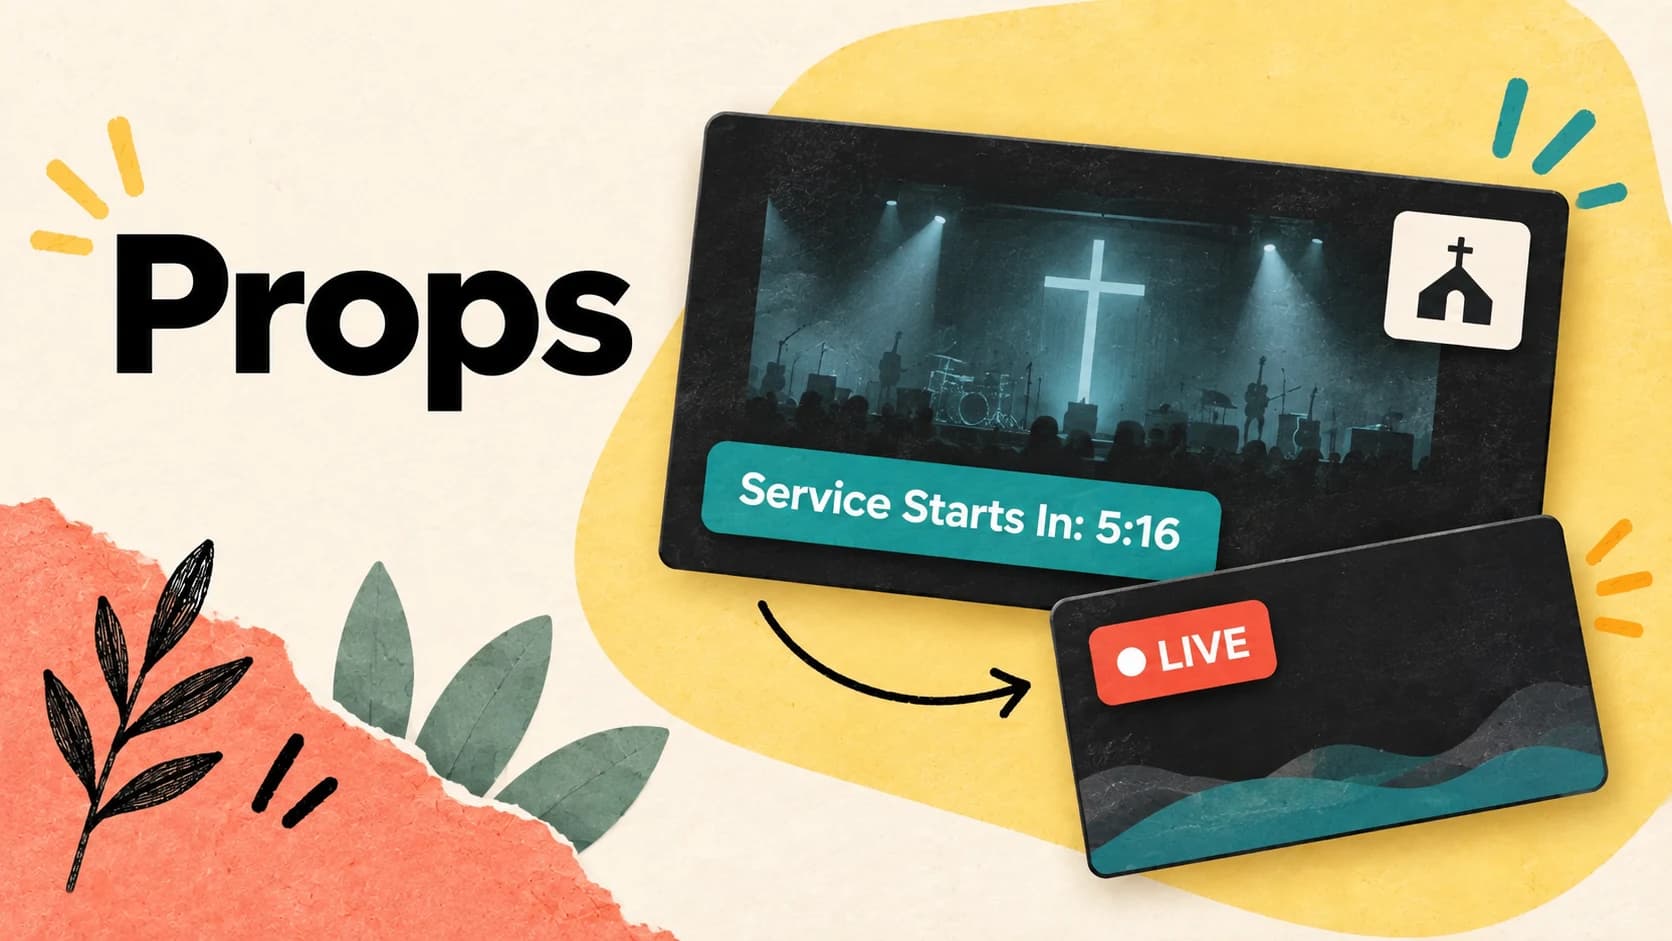
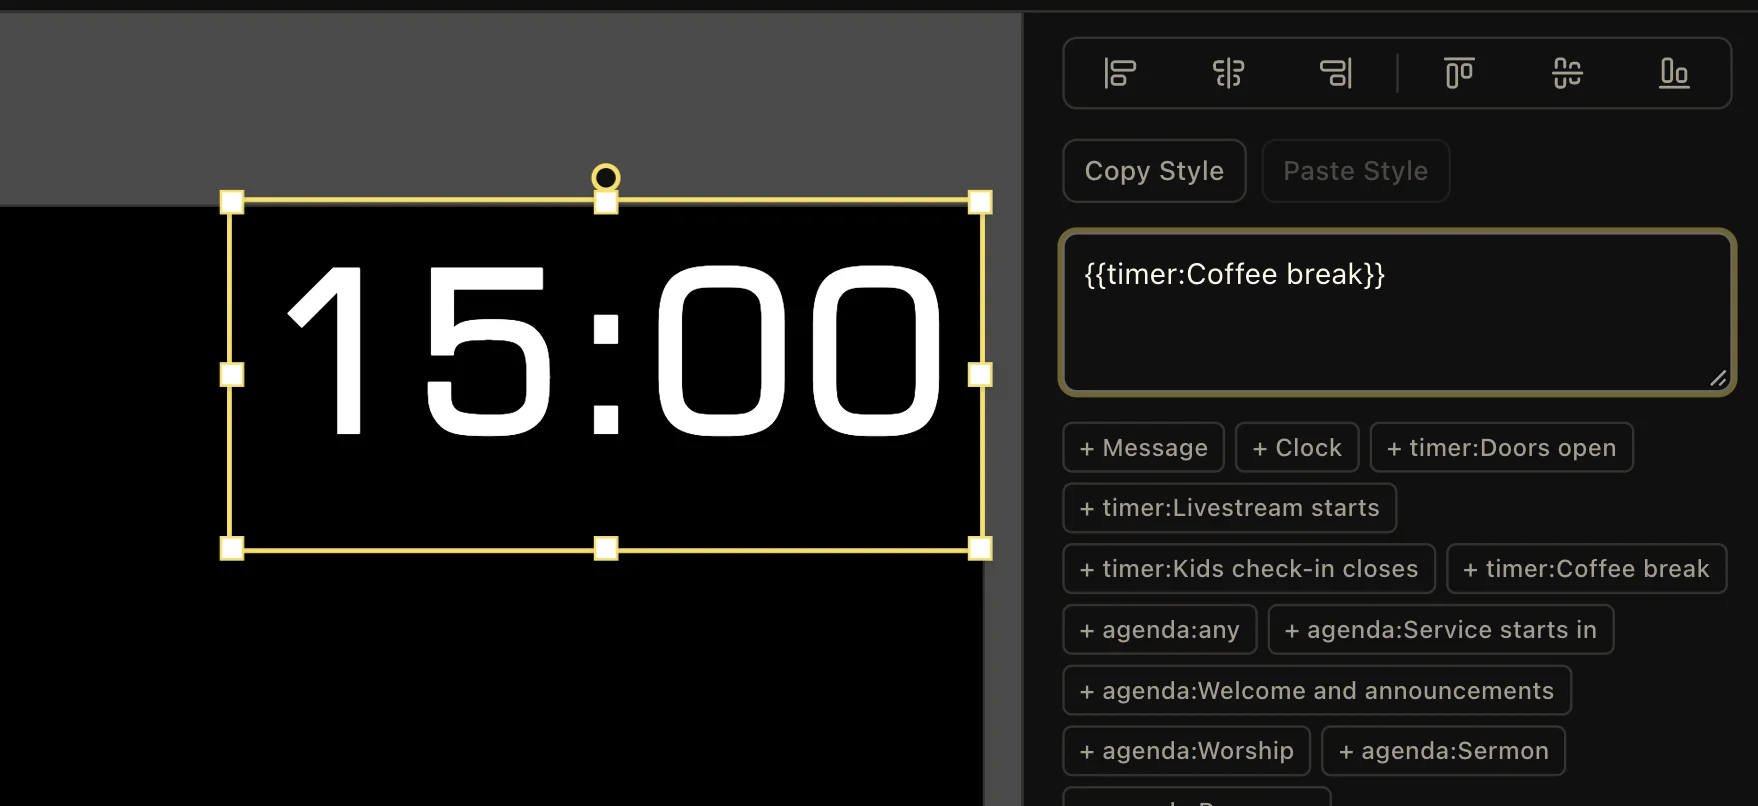
Use {{timer:Name}} for a General timer and {{agenda:Name}} for a named Agenda timer. For example, {{timer:Coffee break}} displays the Coffee break timer, while {{agenda:Service starts in}} reads the matching Agenda item.
Use {{agenda:any}} when the text should follow whichever Agenda timer is current. The editor’s variable buttons insert these tokens for you; style and position the text element as you would other message or prop content.
The variable displays the timer value; run the timer from the Stage tab. Rehearse starting and pausing it, and check the message or prop on the intended output so you know the value and layout are correct.
Keep these three
The short version
- Agenda timers run one at a time for the service sequence.
- General timers each run independently and can overlap.
- Add useful speaker details, notes, labels, and countdown warnings.
- Review links when reordering items or planning automatic handoffs.
- Use timer and agenda variables to display countdowns in messages and props.