Guide 136 min read
LlamaPresenter - Test Patterns
Test patterns give you a consistent image for checking your screens before rehearsal. Use them to spot clipped edges, uneven geometry, poor contrast, unreadable text, or a mismatch between sound and picture.
In the desktop app, open the Display settings window and choose Test Patterns… . Pick an output and a pattern, then show it on the connected display. Inspect the physical screen as well as the Studio preview: the preview alone cannot show problems introduced by a projector or display.
What this guide helps you do
Identify the outputs, check the picture with static and moving patterns, then verify audio/video timing and hide the pattern.
01
Choose and identify your outputs
Use Screen to select one output or All Screens. Turn on Identify Screens to display each output’s name and confirm that the expected screen is connected to the expected destination. Logo lets you include the LlamaPresenter logo or leave it set to None.
Choose a Test Pattern and press Show. The button changes to Hide while the pattern is active. Changes to the pattern controls update the shown pattern, so you can adjust it while inspecting the screen. If Show is unavailable, check that an output has been configured.
- 01Select the output you want to check.
- 02Enable Identify Screens and confirm the destination.
- 03Choose a pattern and press Show.
- 04Disable identification labels when you need a clear view of the pattern.
02
Check framing and geometry with Blend Grid
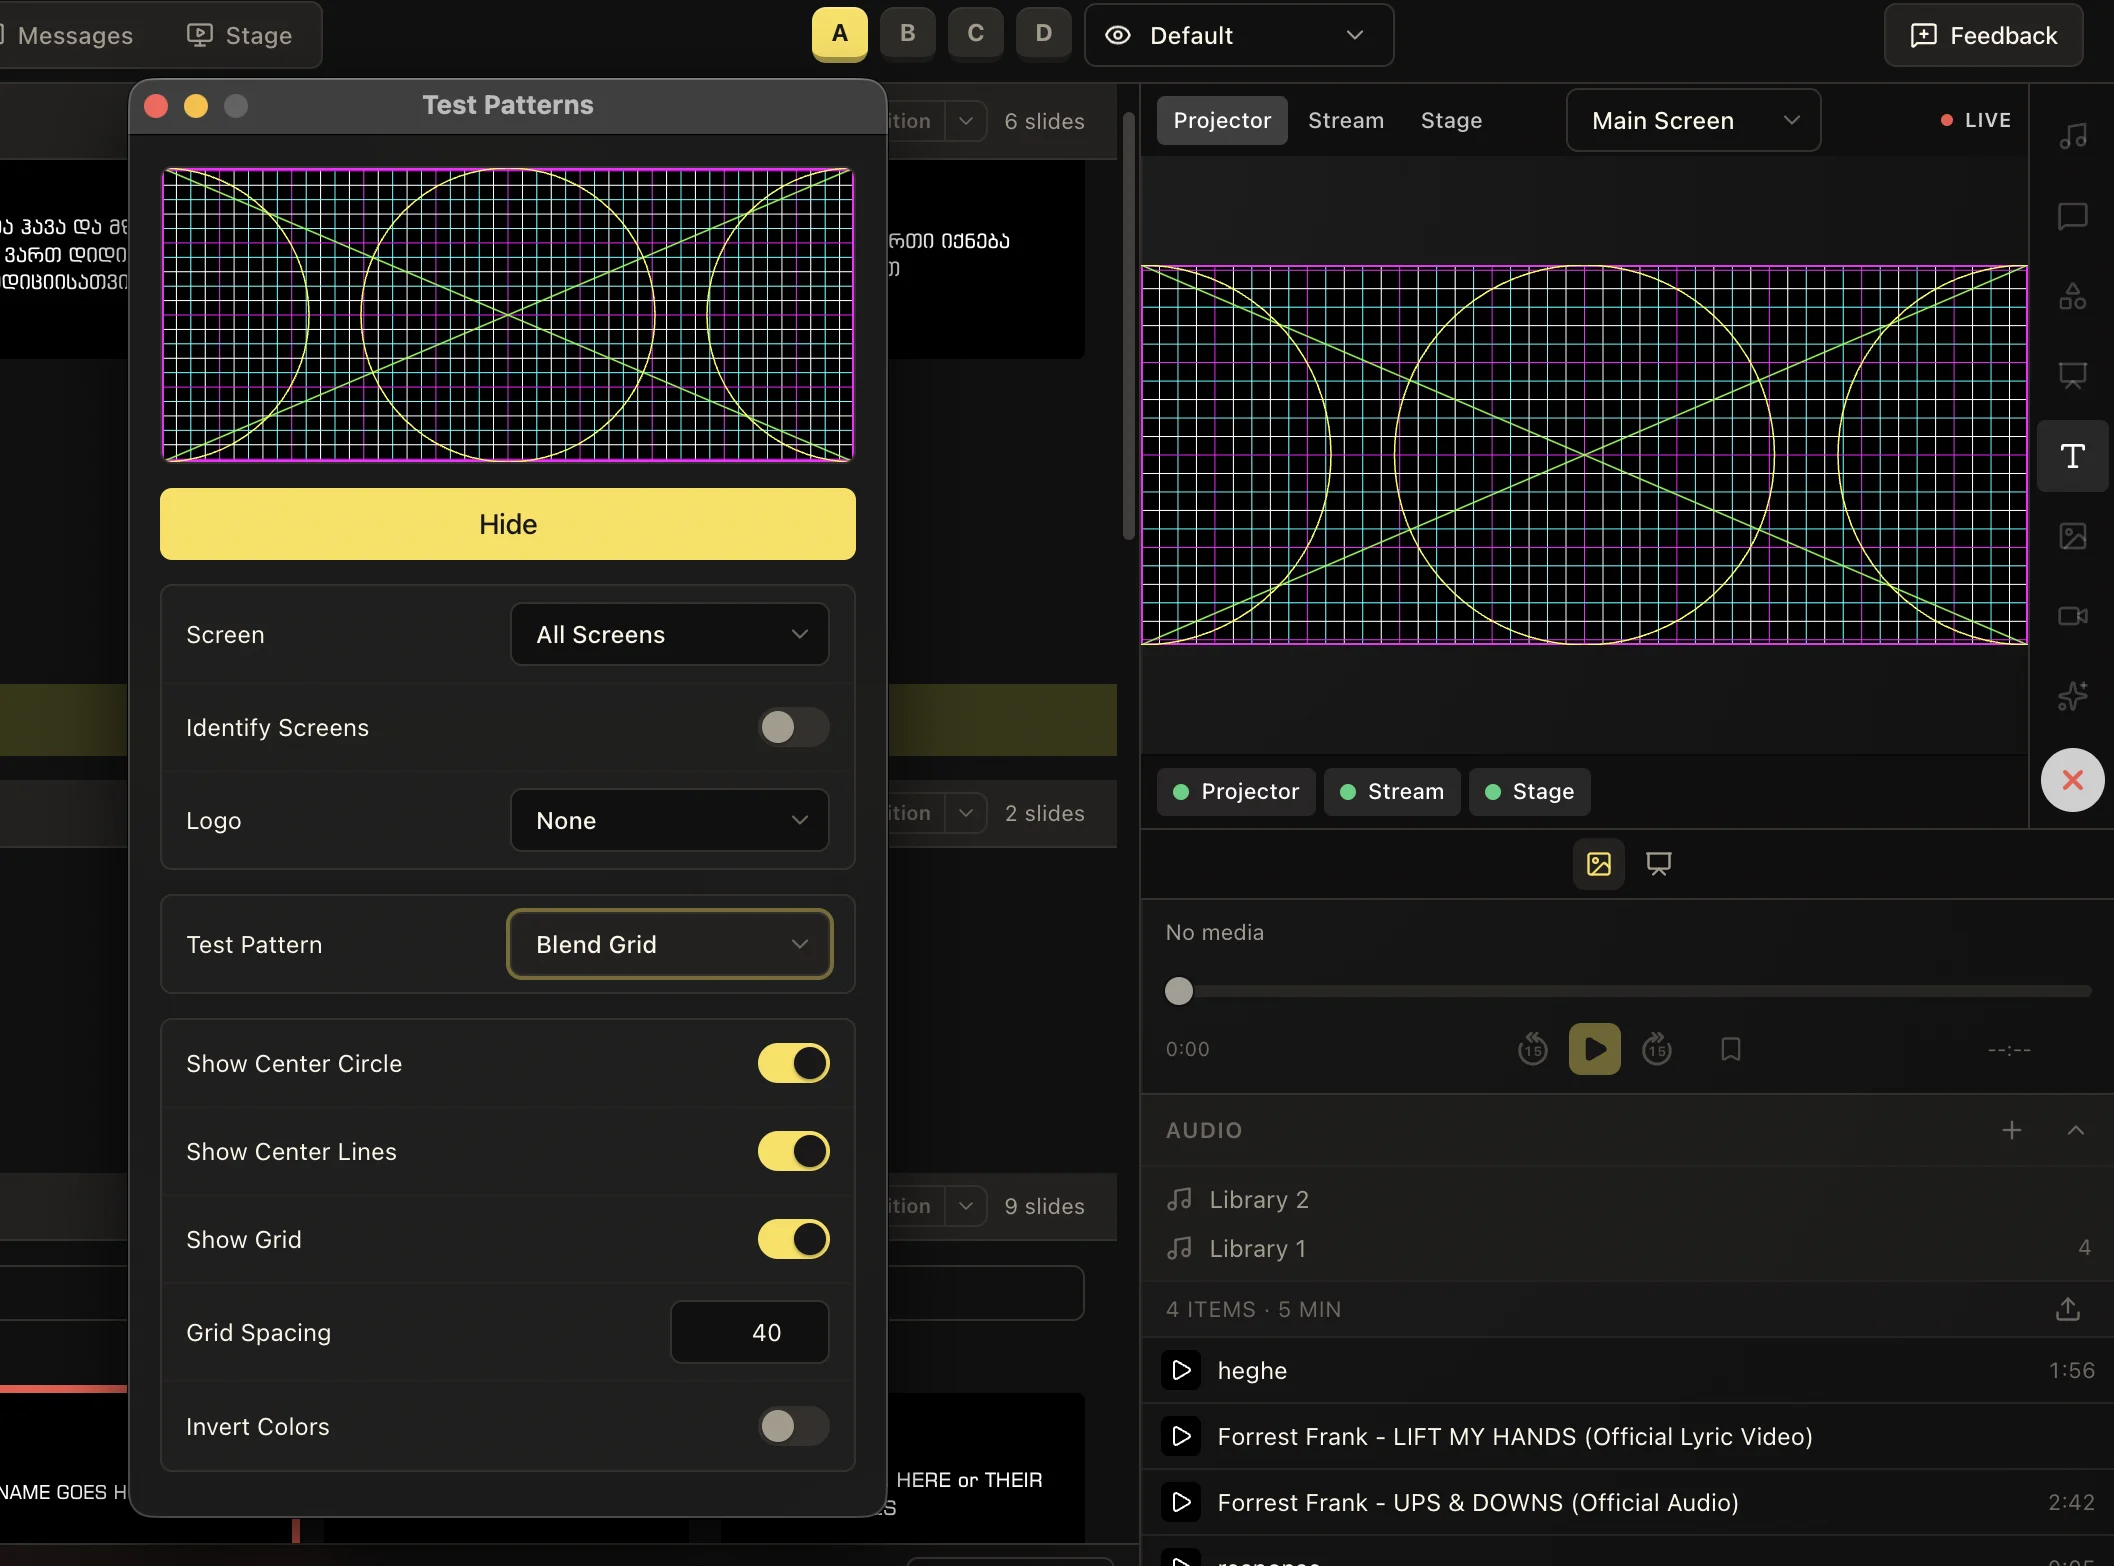
Blend Grid combines a rectangular grid, circles, and diagonal lines. Check that the outer border is visible, the lines stay straight, and the center circle appears round. Compare the pattern across neighboring projectors when checking an overlapping display arrangement.
Use Show Center Circle, Show Center Lines, and Show Grid to isolate the marks you need. Grid Spacing changes the distance between grid lines, and Invert Colors changes the pattern’s contrast. These controls change the reference image; make alignment or projector adjustments in the relevant display setup.
03
Inspect motion with Radar
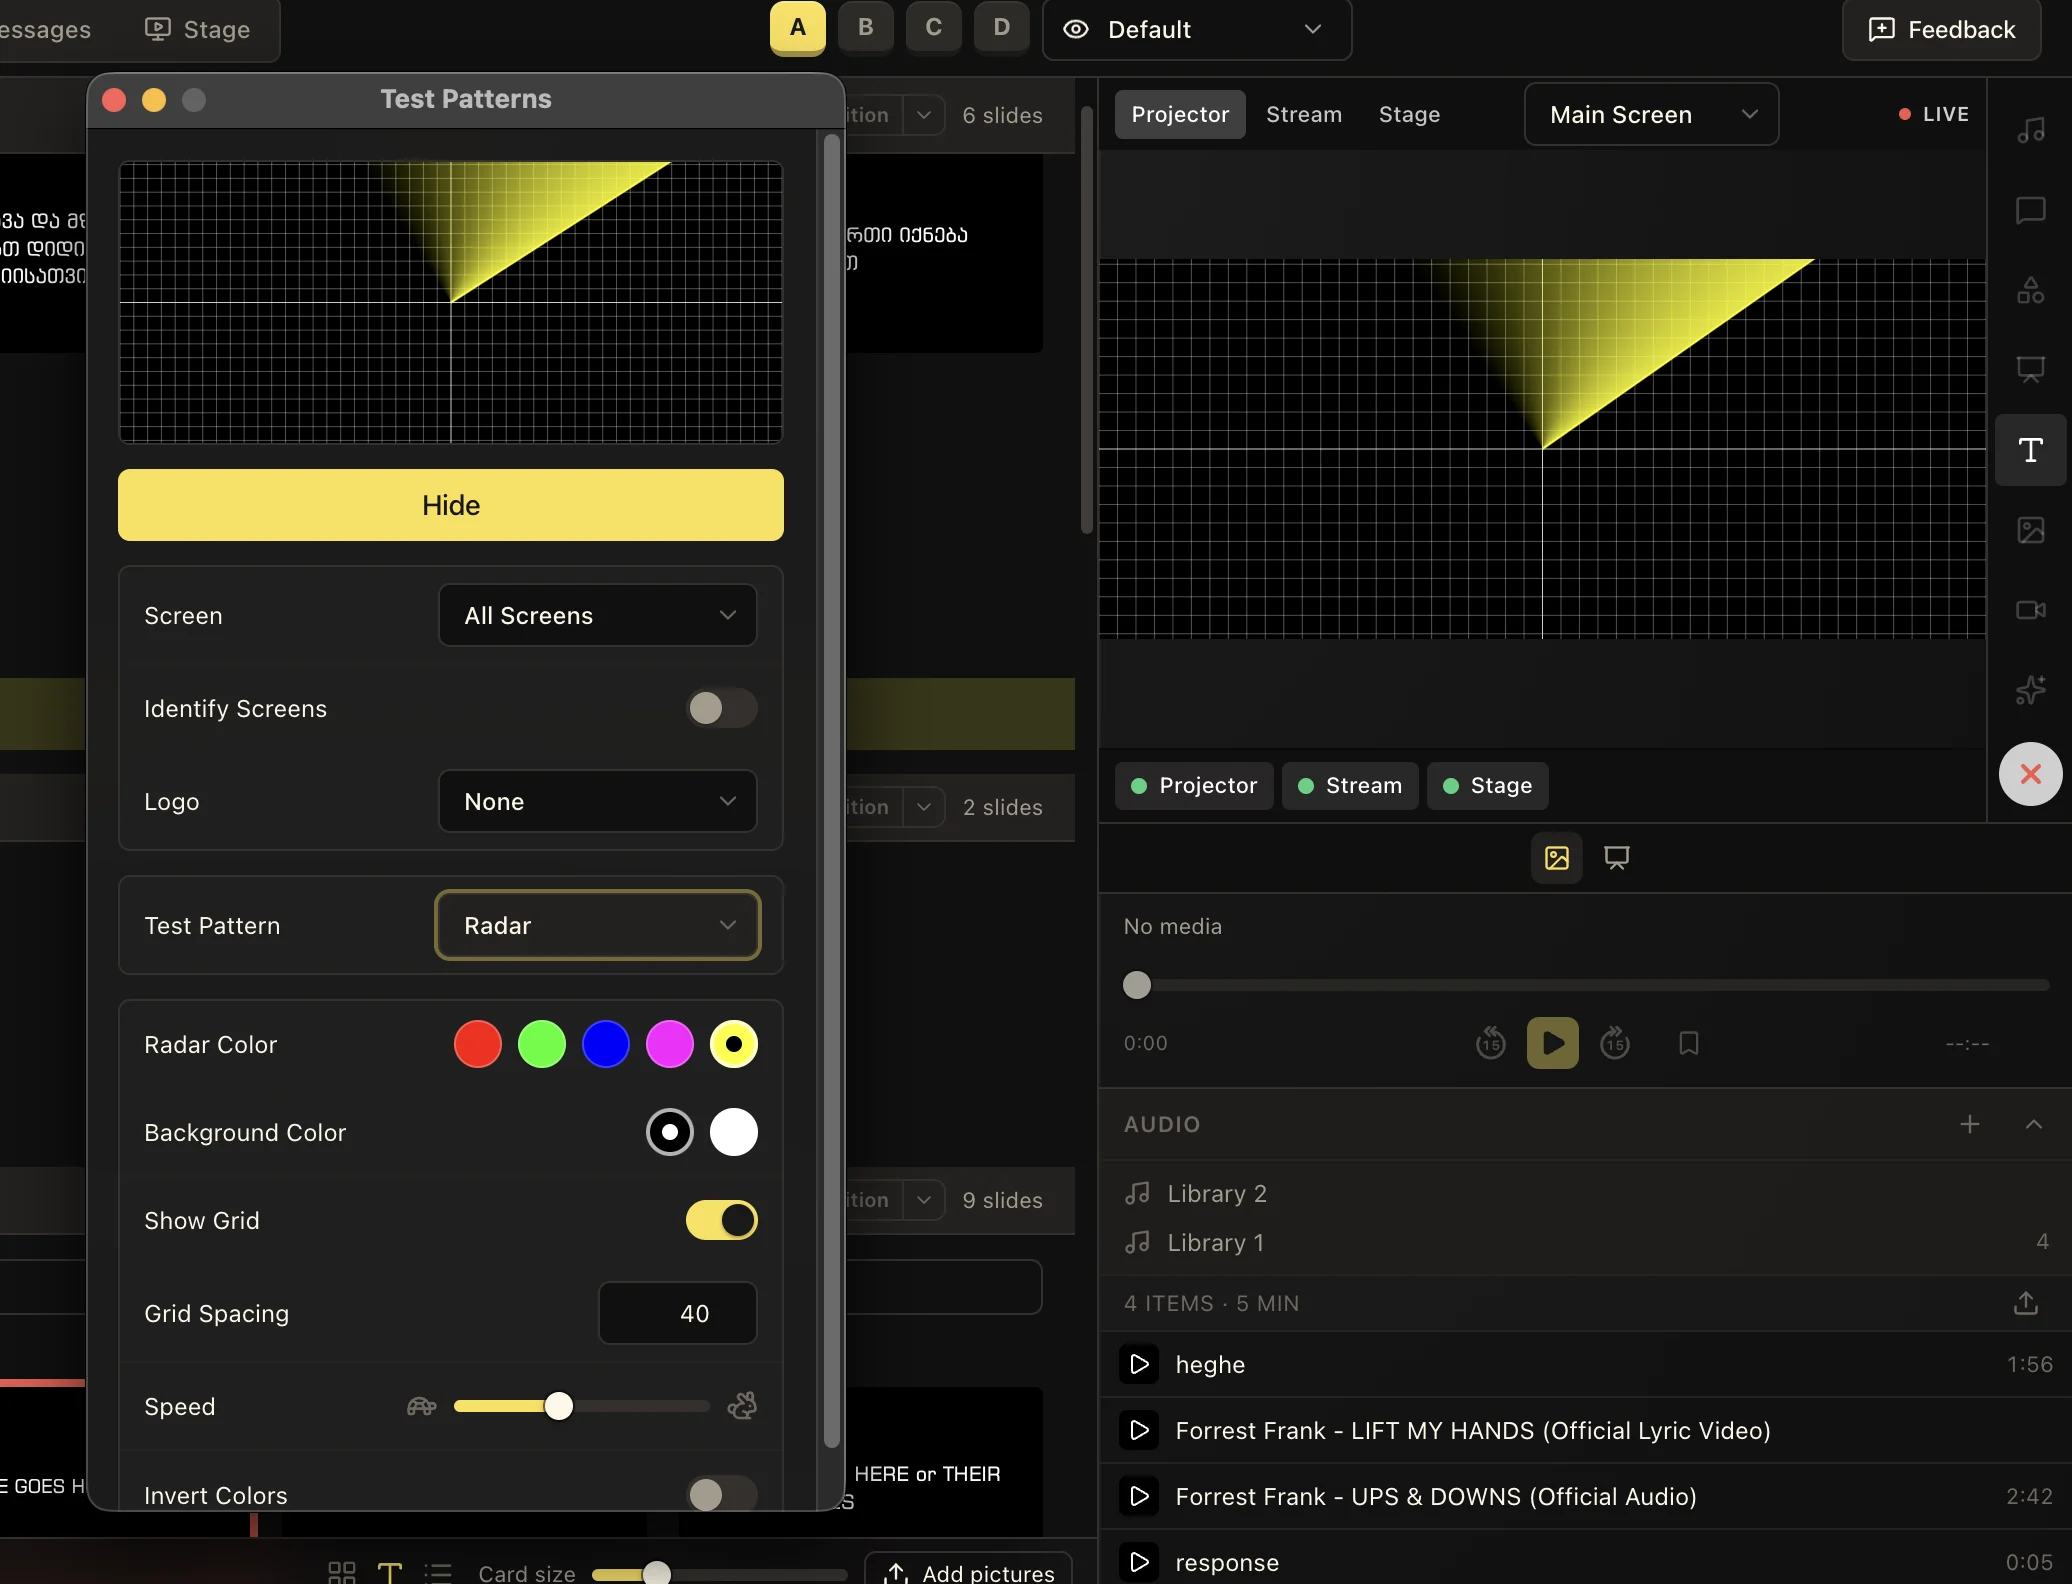
Radar draws a rotating sweep so you can watch how motion travels through the output path. Look for visible stutter, interruptions, or uneven movement on the physical display.
Choose a Radar Color and a black or white Background Color. Enable Show Grid when you want a stationary reference, adjust Grid Spacing, and move the Speed slider to compare slower and faster sweeps. Invert Colors is also available.
04
Compare brightness, contrast, and color
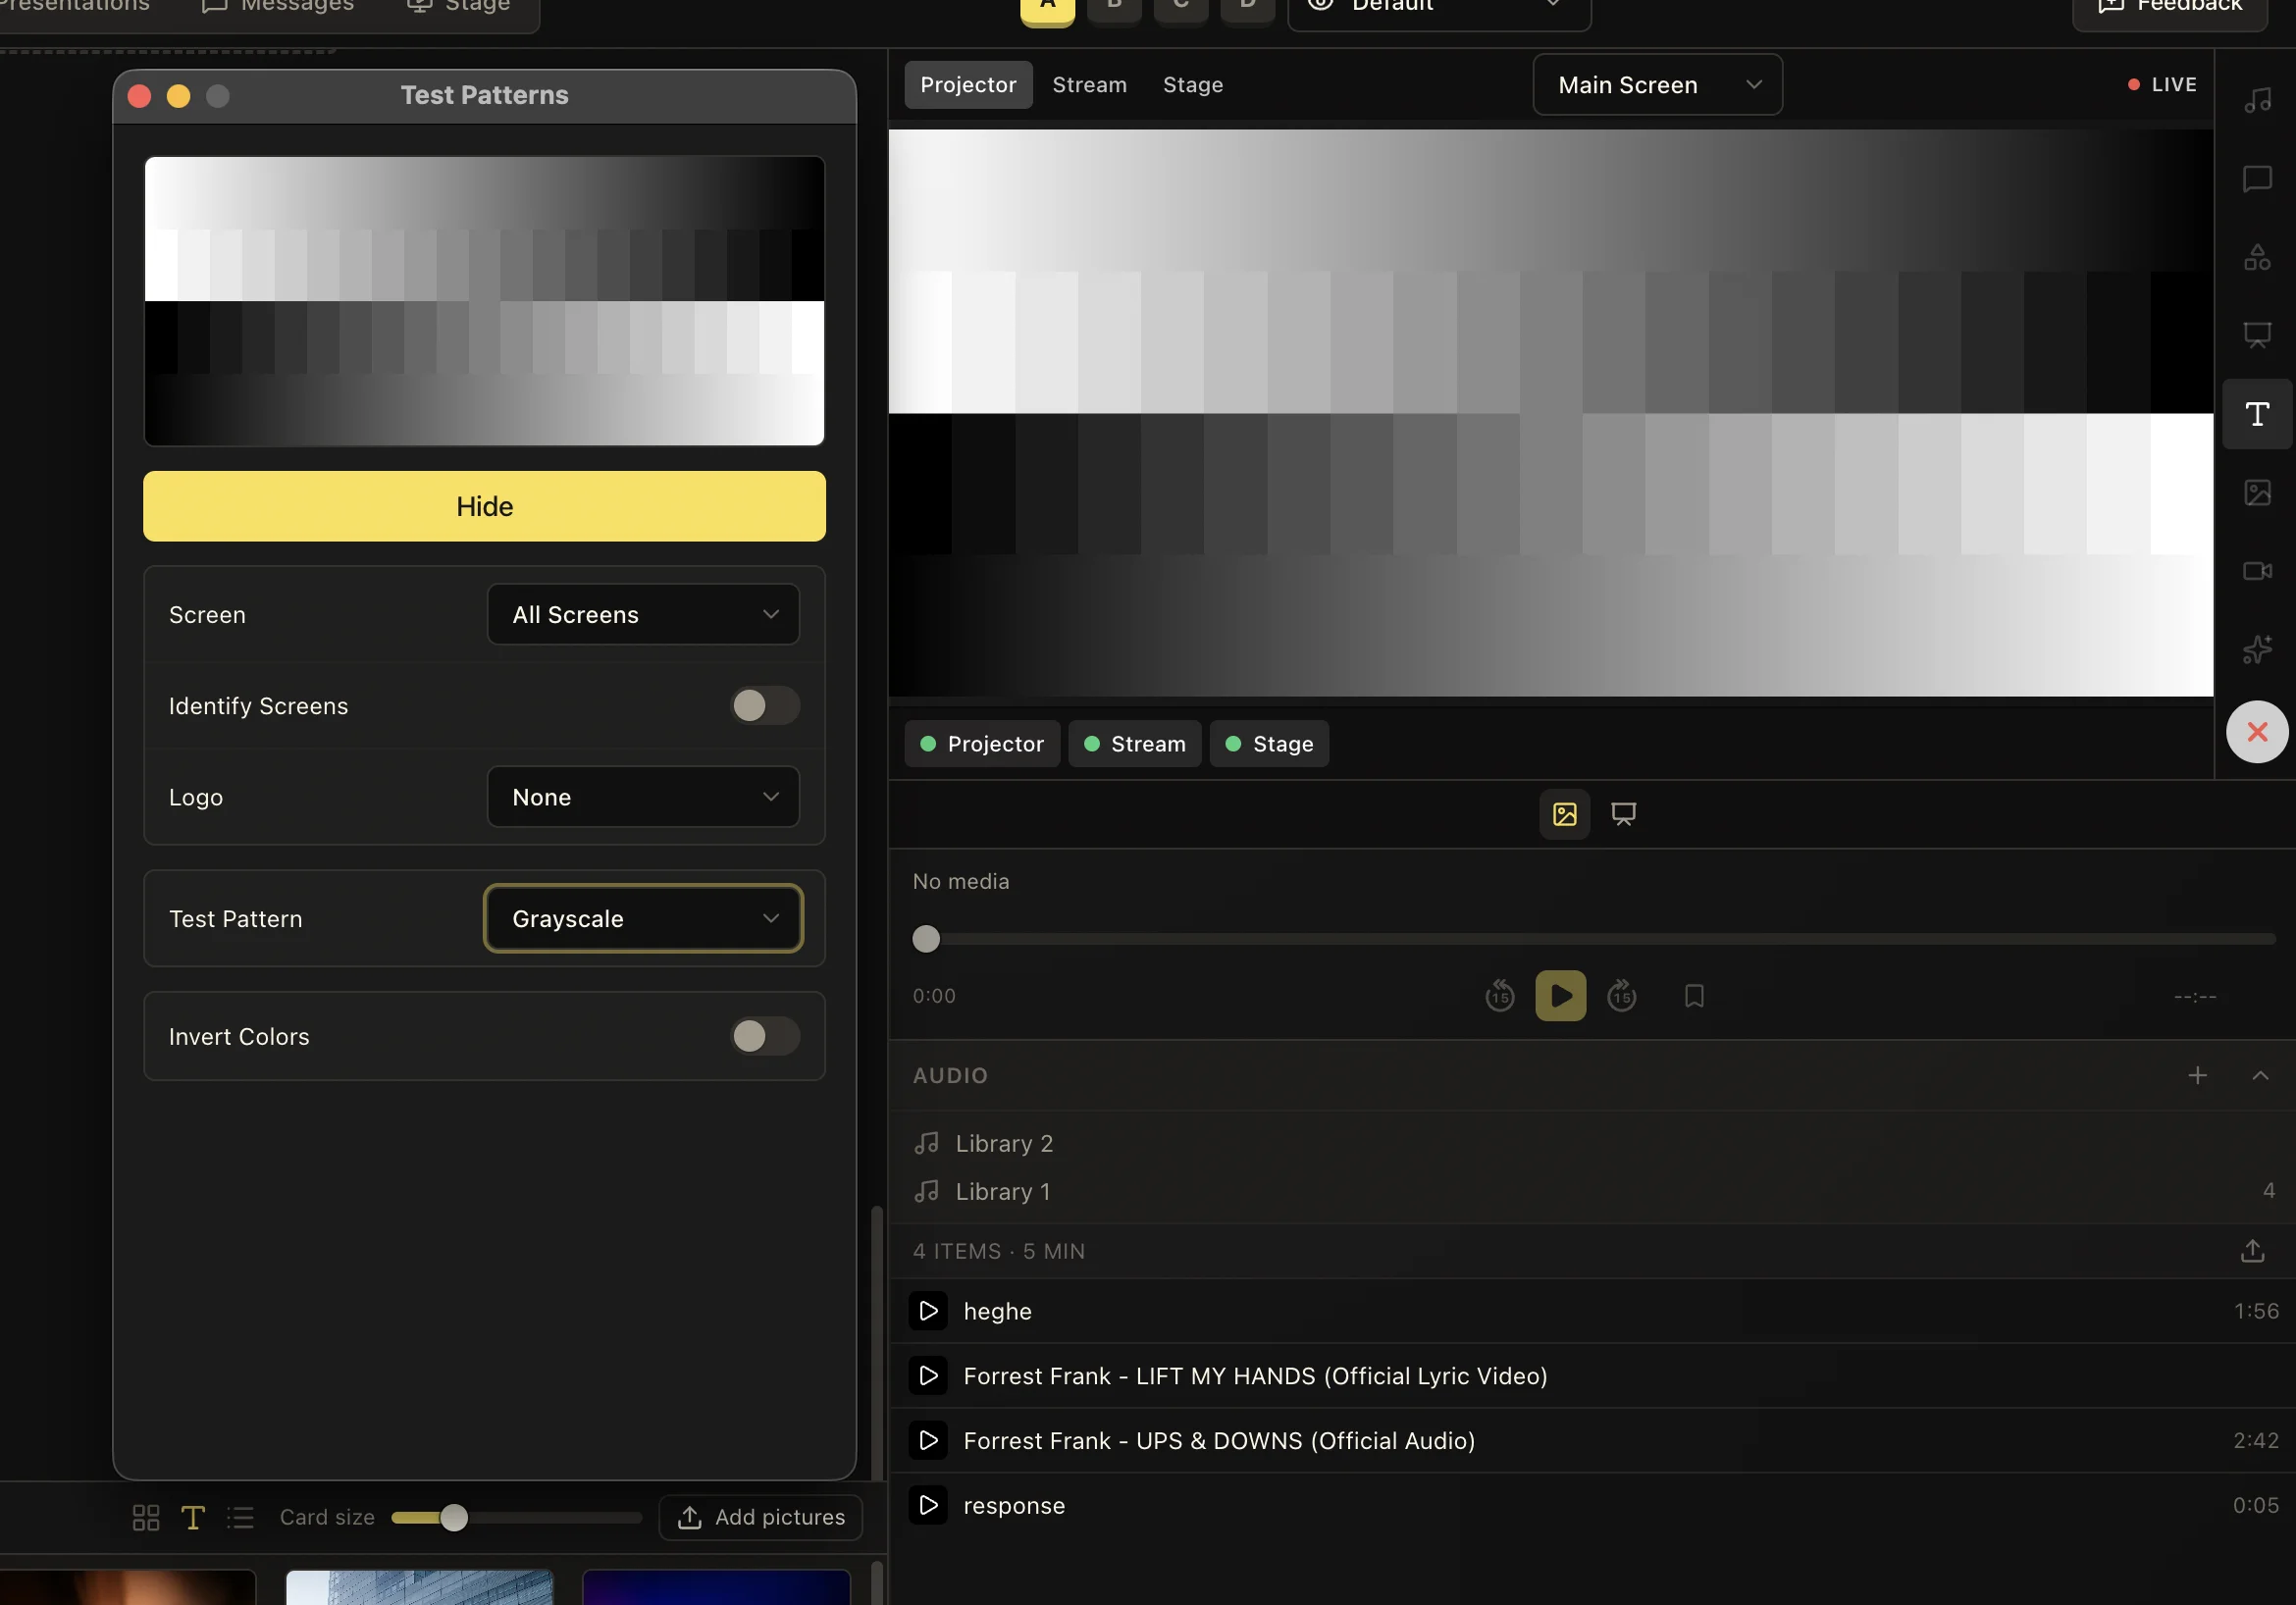
Grayscale shows stepped shades and smooth ramps between black and white. Inspect whether neighboring shades remain distinguishable and whether the darkest or lightest areas lose detail. Compare outputs to spot obvious differences in brightness or contrast.
The Test Pattern menu also includes Color Bars, Gradient, Solid Color, Checkerboard, and Focus. Choose Color Bars or solid red, green, and blue fills to inspect color differences, Gradient for smooth tonal changes, and Focus or Checkerboard for fine detail and sharpness. Use these as reference images while adjusting your display equipment.
05
Check text readability from the room
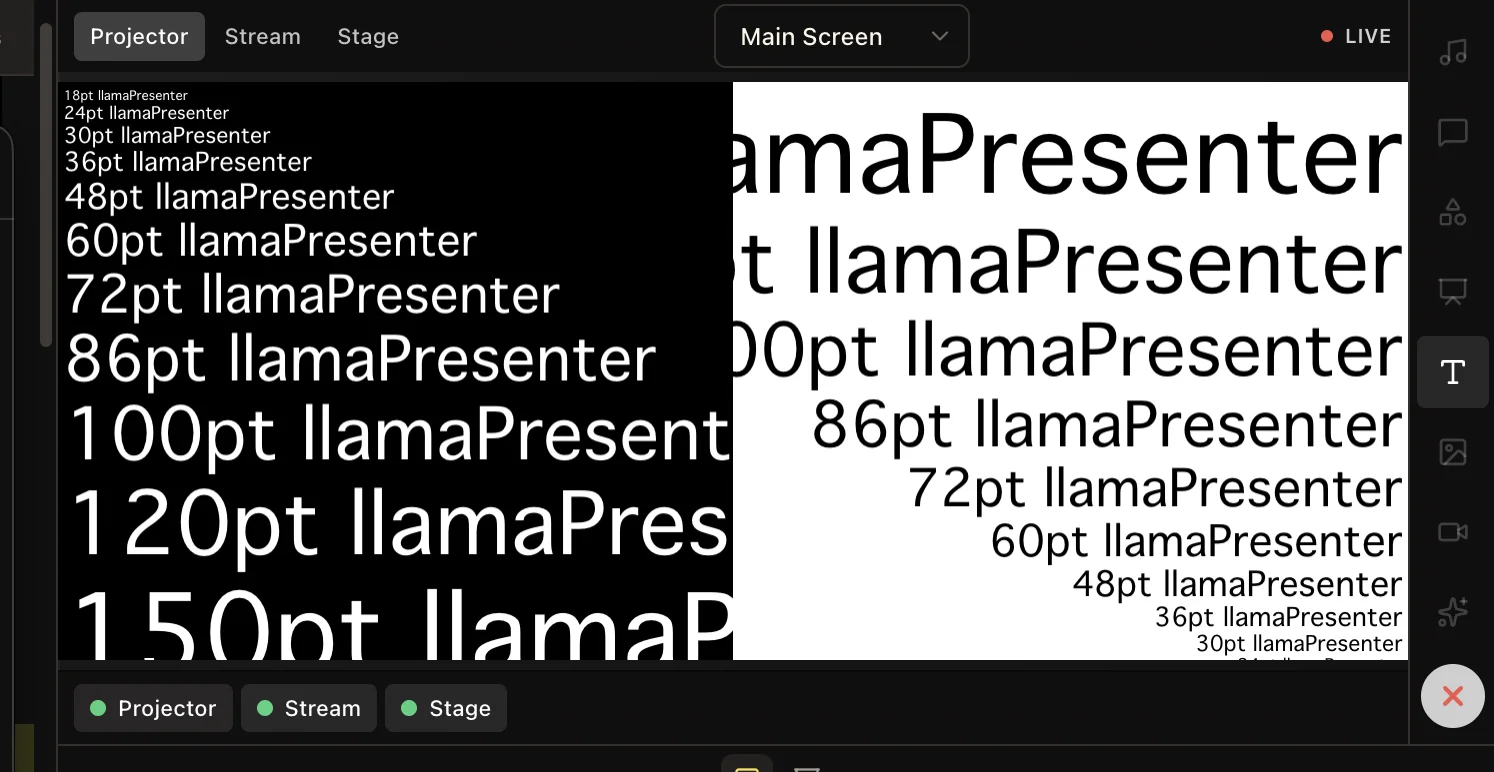
Choose Text to display samples at several sizes against dark and light backgrounds. Use the text and font controls to test wording and a typeface relevant to your service.
Check the samples from the back and sides of the room, where small text is harder to read. The largest samples can extend beyond their half of the pattern, as shown here; use the range of samples to compare legibility rather than expecting every line to fit. Apply what you learn when sizing lyrics and Bible verse layouts.
06
Sync video and audio
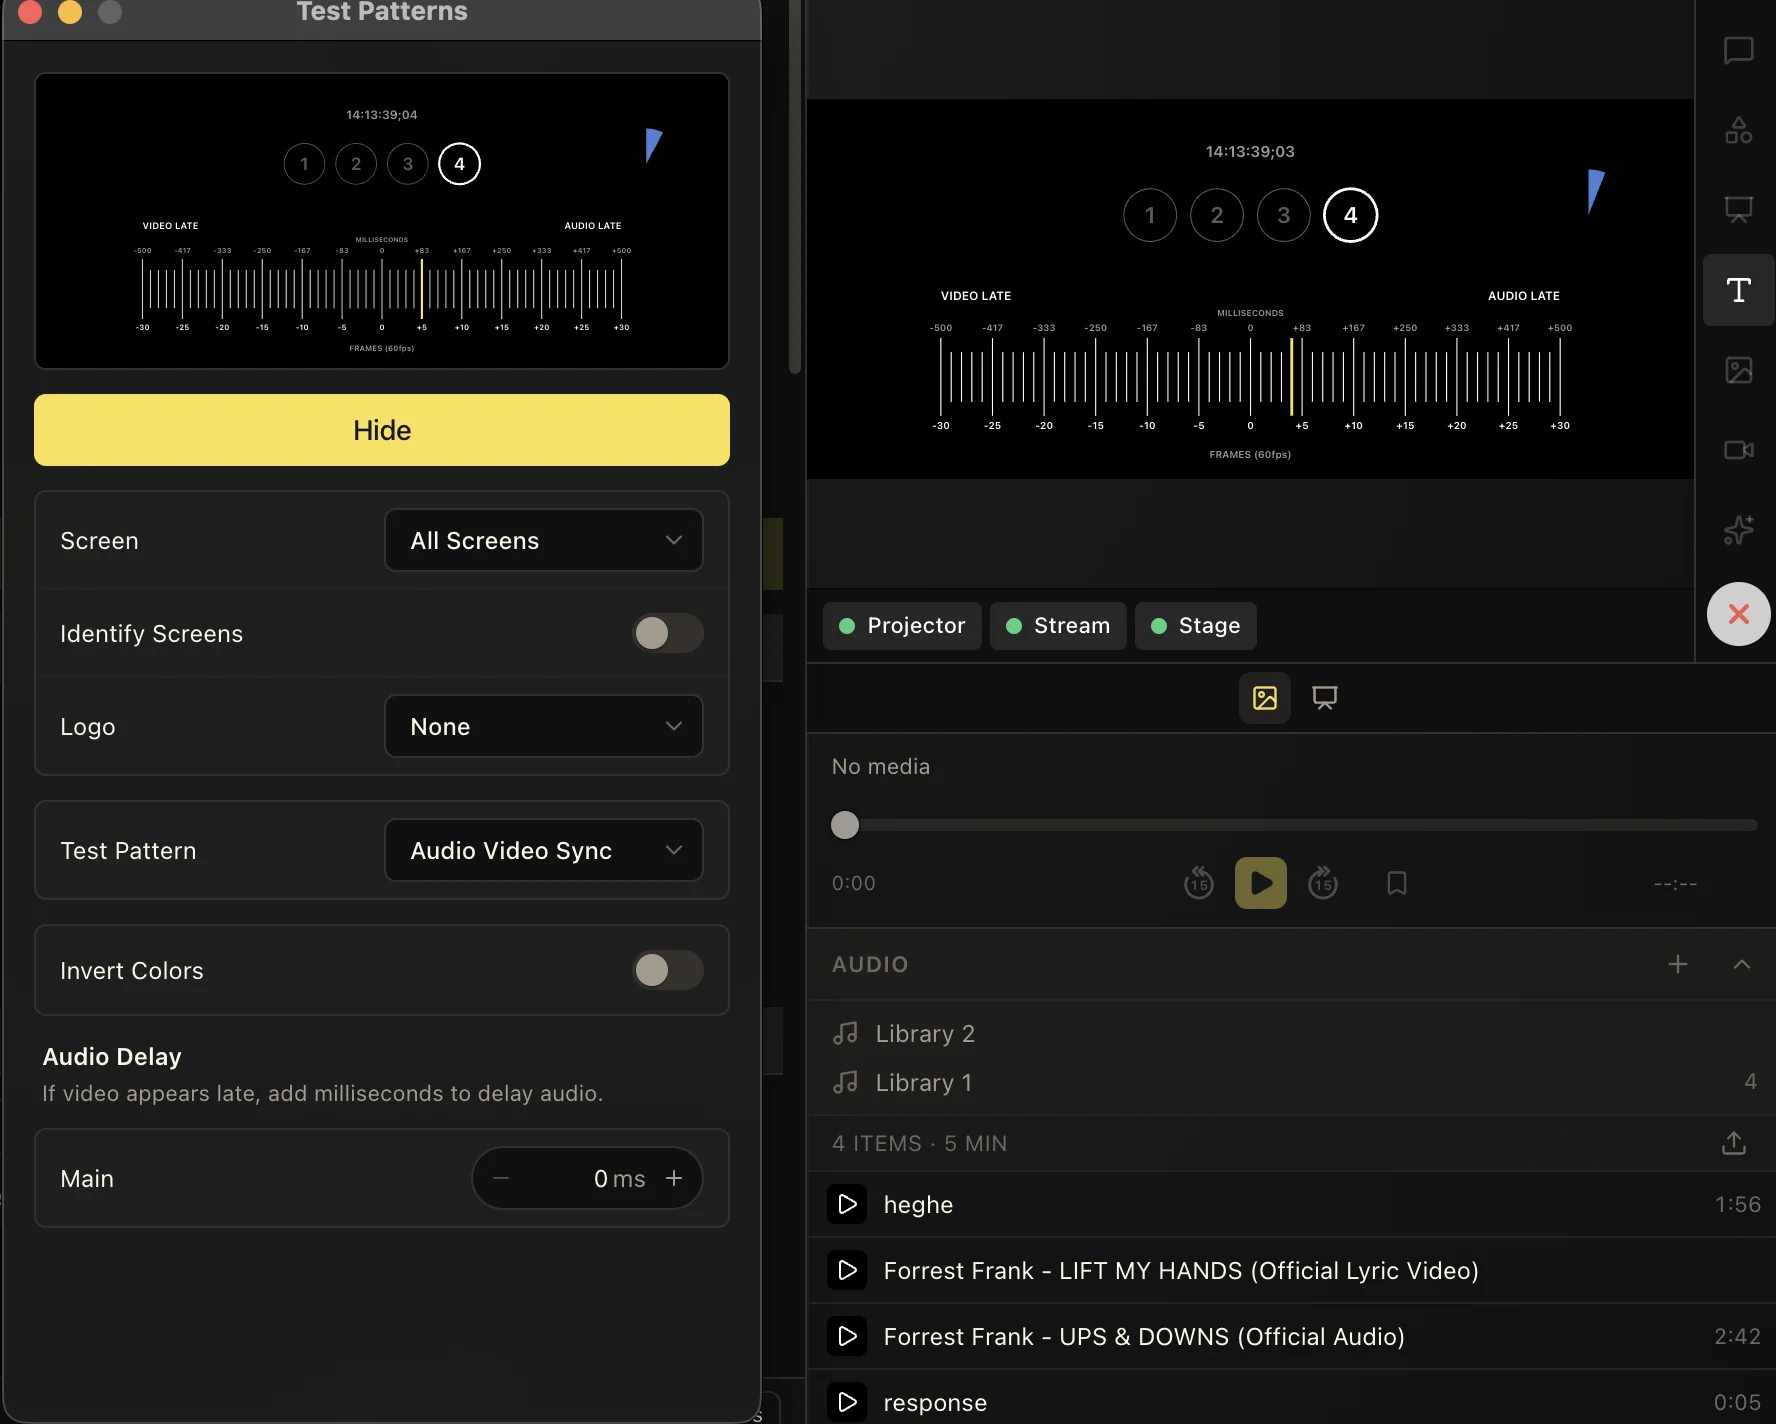
Choose Audio Video Sync and press Show to bring the picture and sound into sync. The pattern pairs a short beep with a visual timing cycle. Watch the actual display and listen through the main audio output to compare when the visual cue and beep arrive.
If you hear the beep before you see the visual cue, increase Main under Audio Delay to delay the audio. Adjust in small steps and repeat until the beep and visual cue arrive together. This setting applies to the main audio output.
If the beep arrives after the visual cue, reduce any existing Main audio delay and test again. If they still do not align, check the audio and video signal paths. Repeat the sync process after changing display hardware or routing, then play a video to confirm that its picture and sound stay in sync.
07
Hide the pattern and rehearse real content
Press Hide when the checks are complete. Closing the Test Patterns window also removes the shown pattern. Turn off Identify Screens if the output labels are still enabled.
Return to representative lyrics, Bible verses, and video. Confirm framing, readable text, and sound timing on each destination before rehearsal ends.
Keep these three
The short version
- Identify each output before testing it.
- Use Blend Grid for framing and geometry, and Radar for motion.
- Compare grayscale, color, sharpness, and text on the physical screens.
- Delay main audio only when sound arrives ahead of the picture.
- Hide the test pattern and confirm your actual service content.